That unsettling moment when you spot a missing lug nut and broken wheel stud—it’s like finding a chink in your car’s armor. Questions race through your mind: “How did this happen? How do I fix this? Is my car safe to drive?” Don’t worry; you’re about to get all those answers and more.
Wheel Stud Replacement
Wheel stud replacement involves removing the affected wheel from your vehicle, taking out the broken or worn-out lug stud, and then installing a new one in its place.
It’s a crucial maintenance step to ensure driving safety and the longevity of your wheel assembly.
In this article, we’ll demystify the world of wheel studs—breaking down the basics, teaching you how to spot a damaged stud, guiding you step-by-step through the replacement process, and answering some of the most common questions folks have about this essential car care task.
Let’s take a closer look.

Wheel Stud Replacement Process
Before we start tinkering with the wheel, a little prep work is in order:
- Safety is King: Make sure your vehicle is on a nice and level surface. Use safety stands or blocks if you’re raising the car. Remember, better safe than sorry!
- Gather Your Tools: Time to round up the gang! You’ll need:
- A lug wrench (yep, our old friend from the basics section).
- A wheel stud removal tool.
- A new stud to replace the broken one.
- And a torque wrench for that perfect tighten.
- Shopping Time: Swing by an auto parts store and pick up the necessary replacement parts. Ensure the new wheel studs you buy are the right fit for your vehicle. Because, let’s face it, one size doesn’t fit all.
Removing the Affected Wheel
With everything in place, we can kick things off:
- Grab your lug wrench and loosen those lug nuts on the affected wheel. Once they’re loose, gently lift the wheel off.
Getting the Broken Wheel Stud Out
Now that the wheel is off, you’ll see the broken stud staring right back at ya. Let’s show it the door:
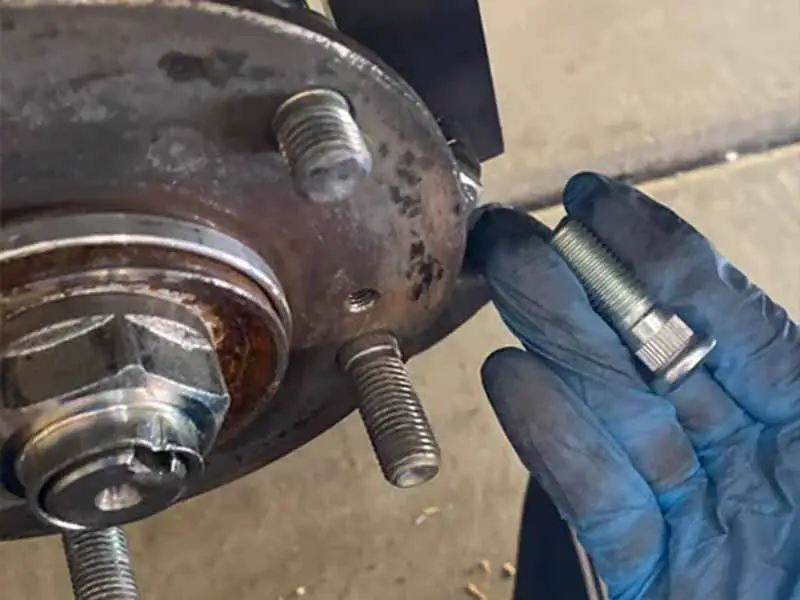
- Find the broken stud on the back of the hub. It’s like peeking behind the scenes of your car’s wheel setup.
- Use that handy wheel stud removal tool to remove the culprit. Don’t have the specific tool? Sometimes a good ol’ hammer and some patience will do the trick, but always be gentle.

Torque Wrench Example
Pressing in the New Stud
1. Aligning the New Stud: Once you’ve removed the old stud, you’ll need to align the new one. Slide the new stud into the hole from the back of the hub, making sure it sits properly in place.
2. Using the Press:
- Setting It Up: Position the hub and new stud under your press. Ensure the press aligns perfectly with the stud’s head.
- Pressing Down: Gently apply pressure using the press, pressing the stud into the hub. Make sure you go slow and steady – you want the stud to be fully seated against the back of the hub, but you don’t want to damage anything in the process.
3. Inspecting Your Work: After you’ve pressed in the stud, inspect it thoroughly. The stud should be straight, and the base should be flush against the back of the hub.
How To Press In Wheel Studs Without A Press
1. Positioning the Stud: Begin by sliding the new stud through the hole in the hub from the backside, ensuring it’s properly aligned with the hole.
2. Lug Nuts and Washers to the Rescue:
- Spacer Method: Grab a couple of washers that fit over the stud. These will act as spacers, helping you draw the stud through the hub without causing damage.
- Lug Nut Magic: On the front side, thread one of your new lug nuts onto the stud, ensuring the flat side faces the washers. This nut will be the key to pulling the stud securely into place.
3. Pressing In The Wheel Stud Without A Press:
- Wrenching It In: Using a lug wrench or a socket and ratchet, gradually tighten the lug nut. As you do this, the stud will begin to pull itself into the hub.
- Fully Seated Check: Keep tightening until the base of the stud is fully seated against the back of the hub. A quick pro-tip: using a torque wrench ensures you’re not over-tightening!
4. Inspection Time: After the new stud is in place, remove the lug nut and your washers. Give the stud a thorough once-over to ensure it’s straight and fully seated against the hub.
Reattaching the Wheel
The finish line is in sight:
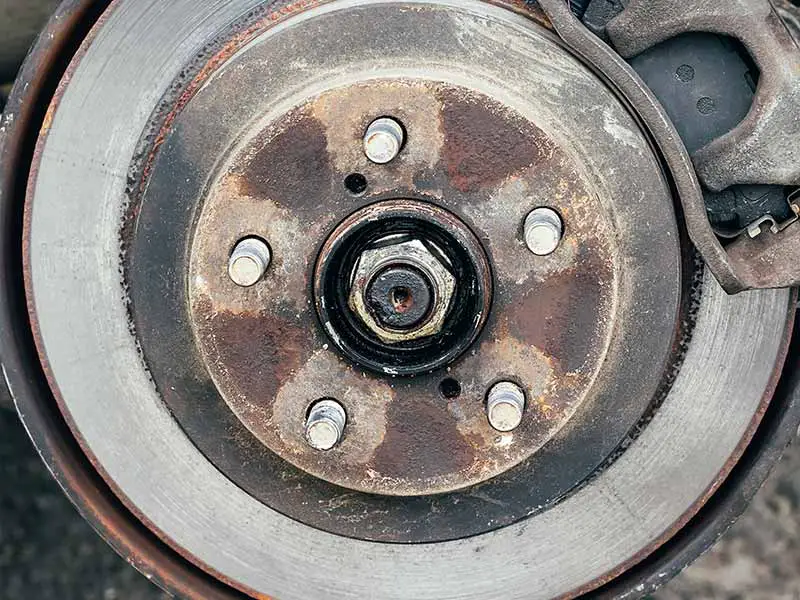
- Position the wheel back onto those shiny new studs.
- Hand-tighten the lug nuts first. Once they’re all on, use your torque wrench to tighten them to just the right level. Each car has its sweet spot, so check your vehicle’s manual for the perfect tightness.
Frequently Asked Questions and Concerns
Alright, team, pop quiz time! Just kidding, but let’s dive into some of the burning questions a lot of folks have when it comes to wheel studs. After all, it’s always good to be in the know.
Do Tire Shops Replace Wheel Studs?
So, can you just swing by any old tire shop and get a stud replaced? Well…
- Most tire shops can, in fact, replace wheel studs. However, not all of them will offer this service.
- It’s always a good idea to give your local tire shop a quick call first. Ask them if they replace wheel studs and get a price quote while you’re at it.
Can I Really Do the Installation Myself?
You’re feeling the DIY spirit, and that’s awesome! But is it really doable?
- Skill Level: If you’re comfortable with basic car maintenance (like changing a tire), then with the right tools and a bit of patience, you can likely handle a stud replacement.
- Importance of Seating: Remember when we talked about the new stud being fully seated? This is key. If you’re unsure about this step or any part of the process, it might be a good idea to consult a pro.
- Safety: Always prioritize safety. If you’re not 100% confident, there’s no shame in seeking help.
Wheel Stud Basics
Sometimes they’re called lug studs, wheel studs, or lug bolts, but for our chat, let’s stick to lug studs. These are like the pins on which your wheels hang.
- They’re the parts that your wheel’s lug nuts screw onto.
- Think of lug studs as the anchor points. They make sure your wheels stay attached to your car or truck. You definitely wouldn’t want to be cruising down the highway without them!
The Handy Lug Wrench
The lug wrench tool might look simple, but it’s super important.
- Its primary job is to remove or tighten lug nuts on the lug studs.
- They come in different shapes, but the most common one looks like a cross. This design lets you get a good grip and apply the muscle you need to loosen or tighten those nuts.

How Much Does It Cost To Replace Wheel Studs?
If you’ve found yourself with a broken wheel stud (or several), you’re probably wondering about the damage to your wallet. Let’s dive into the dollars and cents of it.
DIY: Savings with Sweat Equity
If you’re a hands-on kind of person and have some basic car know-how, going the DIY route can be a cost-effective option.
- Parts: Wheel studs aren’t too pricey on their own. Typically, a new stud can cost anywhere from $2 to $10, depending on the make and model of your vehicle. Remember, it’s always a good idea to replace lug nuts at the same time, which might add a bit to the cost.
- Tools: If you don’t already have the necessary tools like a lug wrench, wheel stud removal tool, and a torque wrench, there’s an upfront cost. However, these are good investments for future DIY car projects.
Professional Labor Cost
For those who’d rather leave it to the pros, the costs increase is mainly due to labor charges.
- Labor Costs: Depending on the complexity of the job and where you live, labor can range from $40 to $100 or more per wheel. Some mechanics might charge a flat fee, while others may charge per hour.
- Parts: When a mechanic sources the parts, there might be a slight markup. The parts cost will likely still fall within the $2 to $10 range per stud, but don’t forget about those lug nuts!
Extra Costs to Consider
- Vehicle Make and Model: Luxury vehicles or those with specialty parts might incur higher costs for replacement studs.
- Location: Just as with everything, prices can vary based on location. A repair job in New York City might cost more than in a smaller town.
- Number of Studs: If you’re replacing multiple studs, the costs can add up. However, if more than one stud is damaged, some mechanics might offer a reduced rate for each additional stud.
Resources
Below are some links you may find helpful when learning about tires
- A full guide to wheel stud replacement – Family Handyman
- How to change broken or damaged wheel studs – Advance Auto Parts
Final Thoughts
Whether you’re diving into a DIY fix or trusting a pro, replacing a damaged stud is crucial. Keep in mind the costs, tools, and always prioritize safety. After all, it’s not just about extending the life of your vehicle—it’s about ensuring every journey is a safe one.
Drive on with confidence, knowing you’ve got the knowledge to tackle any wheel stud challenges that come your way!
Good luck and happy motoring.