Learning how to rotate tires at home is fairly simple and a good way to extend the life of your tires.
It does however require having the right tools to make sure that it can be done safely and properly, as well as understanding tire rotation patterns.
Key tools to know about ahead of time are a proper jack as opposed to the emergency jack included with your car or truck, jack stands, and a torque wrench.
You also need to know what tire rotation pattern the vehicle manufacturer recommends for your car or truck.
Your owner’s manual will include recommended tire rotation patterns and torque specs for your lug nuts to avoid damage to your brake discs, studs, and hubs.
There’s a lot more to know so let’s dive into the details of this very manageable DIY tire maintenance task.
How To Rotate Tires Properly
1. Find A Level Solid Surface to Work
2. Apply Emergency Brake
3. Inspect Your Tires
4. Remove Any Wheel Covers
5. Loosen Lug Nuts Slightly
6. Jack Up The Vehicle And Place Jack Stands
7. Remove The Lug Nuts And Wheels
8. Place Wheels Where They Will Be Rotated
9. Put Wheels On And Finger-Tighten Lug Nuts
10. Remove Jack Stands And Lower Vehicle
11. Torque All Lug Nuts
12. Reinstall Any Wheel Covers
13. Test Drive To Ensure Vehicle Drives Properly
14. Relearn TPMS Sensors Positions (If Necessary)
Important Note: Tire Warranty
Before you begin, you should know that performing a tire rotation yourself can void the warranty the tire manufacturer offers on the tires that you have on your car or truck.
As part of most tire warranties, it is required that you show proof of regularly rotating your tires to make a warranty claim. By performing a tire rotation yourself you will not be able to provide documentation to prove a tire rotation was performed.
Tire Rotation Patterns
Tire rotation patterns vary based on different factors. The main factor is the axle or axles that drive the vehicle forward. Other factors that affect rotation patterns are directional tires and staggered wheel sets.
For details, I recommend you read our article on tire rotation patterns.
Most vehicles will use one of the following rotation patterns based on the drive axle:
Front Wheel Drive Vehicles
Front wheel drive vehicles cause more tire wear on the front tires. They benefit most from the forward cross pattern.

Forward Cross Tire Rotation Pattern
The forward cross pattern moves the rear tires forward and across the vehicle. The front tires move to the rear and remain on the same side of the car or truck.
Rear Wheel Drive Vehicles
Rear wheel drive vehicles cause more tire wear on the rear tires. They benefit most from the rearward cross pattern.

Rearward Cross Tire Rotation Pattern
The rearward cross pattern moves the front tires rearward and across the vehicle. The rear tires move to the front and remain on the same side of the car or truck.
All Wheel Drive Vehicles
All wheel drive vehicles can stress each tire in unique ways. The most effective method of tire rotation for all wheel drive or four wheel drive cars and trucks is to use the X-pattern of tire rotation.

X Tire Rotation Pattern
The X-pattern moves the rear tires forward and across the vehicle. The front tires move rearward and also move across the vehicle.
The X-pattern is also acceptable to use for front wheel drive and rear wheel drive vehicles although the forward cross and rearward cross are more effective tire rotation patterns.
Directional Tires
Directional tires can not switch sides of the vehicle and limit rotating tires to simply front to rear. If directional tires are switched to the other side of the car or truck they will be spinning in the wrong direction and not perform as designed.
It is possible to remove the tires from the wheels and flip the tires and remount them but usually isn’t recommended due to the negligible benefits of doing so.
Front-to-rear rotation isn’t as ideal as the other methods but is still quite effective.

Front to Rear
Front-to-rear tire rotation simply swaps the front tires and rear tires without crossing the vehicle.
Staggered Wheels
Staggered wheelsets are when the front wheels or tires are a different size than the rear wheels. Usually, the rear wheels are wider than those in the front. This configuration limits tire rotation to a side-to-side pattern.
Unfortunately, this rotation pattern has limited benefits but is better than not rotating your tires.

Side To Side
Side-to-side tire rotation simply swaps the front tires with each other and the rear tires with each other.
Tools Needed
Always make sure you have everything you’ll need before beginning the job.
Vehicle Jack
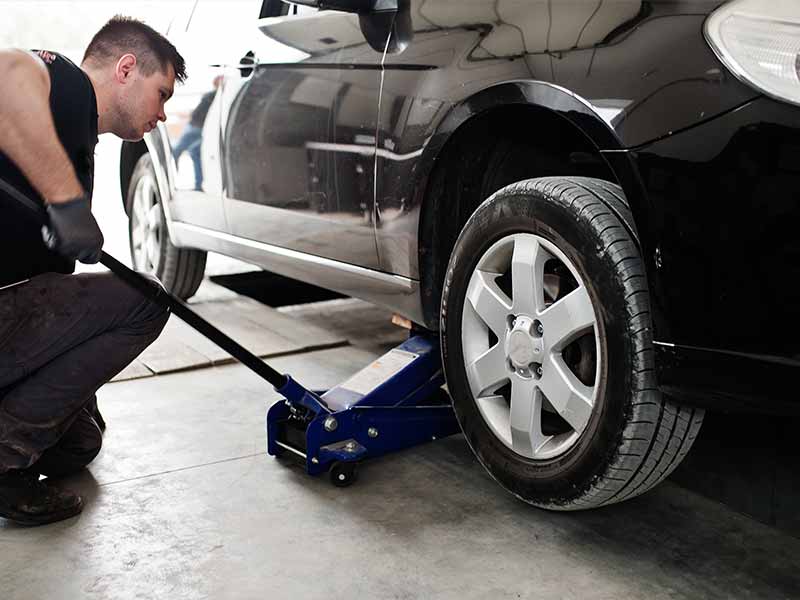
Emergency jacks that come with your car or truck are only meant for emergency use. They are designed to be compact yet still work at a minimum level.
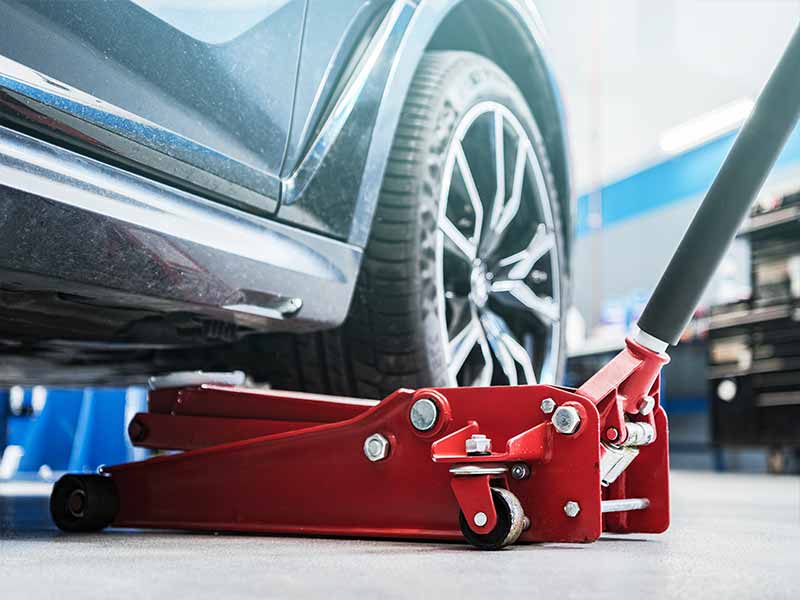
A proper floor jack is significantly easier to use and much safer. It will have a more stable base and will make reaching jacking locations more convenient.

Hydraulic Jack And Jack Stands
4 Jack Stands
Jack stands to ensure that your vehicle will be securely off the ground and safe to work around. Jacks should not be used as the only method of suspending your car or truck in the air when performing a tire rotation.
Wheel Chocks
Wheel chocks should be placed at each tire that isn’t being raised to prevent your car or truck from rolling or shifting.

Wheel Chocks
Lug Wrench
The lug wrench provided with your vehicle will work but they tend to be shorter to save space in your car or truck.
A full-sized lug wrench will give you more leverage and make loosening stubborn lug nuts much easier.
Torque Wrench
A torque wrench is required for reinstalling lug nuts. Over-tightening lug nuts can cause problems such as warped brake rotors or seized lug nuts.
")
Torque Wrench
Keys To Locking Lug Nuts (If Equipped)
Some vehicles may be equipped with locking lug nuts to prevent theft of your wheels. These lug nuts require a specially designed key to use with your lug wrench to loosen the lug nuts.
Often, these keys are kept with the emergency tire kit. Although they may sometimes be found in the glove box.
 - Set of 4")
Example Wheel Locks and Lug Key
Steps To Rotate Tires At Home
1. Find A Level, Solid Surface To Work
It’s important to be sure you’re working on level ground and that the surface can support jack stands safely. Dirt, gravel, or asphalt can allow jack stands to shift which can lead to the vehicle falling off and causing damage to the car or truck, or harming you.
Concrete is the best surface for using jacks and jack stands since it won’t shift under the weight of your vehicle.
2. Apply Emergency Brake
Once you’ve found a good place to work you want to make sure that your vehicle isn’t going to go anywhere while you’re working.
Ensure you’ve placed it in “Park” if it’s an automatic, or make sure your car or truck is in first gear if it’s equipped with a manual transmission.
3. Inspect Your Tires
It’s important to give your tires a quick inspection to ensure there are no punctures that have gone unnoticed or other damage that could be of concern.
As I’m sure you’re aware, not all tire punctures will immediately lead to a flat tire. Give your tires a quick pressure check to ensure each is holding air well and at the correct pressure listed on the sticker in your driver’s door jam.
It’s also important to inspect tread depth to make sure it’s not time to replace a tire. You can use a dedicated tread depth tool, but a penny will do the trick just as well.

Also, have a good look at the tread wear overall. Make sure that the tread is wearing evenly and that there aren’t any unusual wear patterns. Uneven tread wear can be an indication of tire balance or alignment problems.
Last, it’s important to give your spare tire a check. I like to include spare tire maintenance as a standard part of tire rotation so that I keep it checked regularly.
Spare tires often get neglected and you don’t want to be stranded on the side of the road when you discover your spare no longer holds any air pressure.
4. Remove Any Wheel Covers
Wheel covers are a common method of dressing up inexpensive steel wheels without the expense of premium rims. Often these covers need to be removed to access the lug nuts properly.
Sometimes lug nuts will have covers on them as well either for protection or aesthetics. Check if this is the case and remove them before trying to use your lug wrench. Decorative lug nut covers can look like real lug nuts but a lug wrench will damage them.
5. Loosen Lug Nuts Slightly
With your car or truck still on the ground, loosen each lug nut a bit so that it will take less force to remove the nuts once you raise the vehicle into the air.
Once your car or truck is on jack stands there will be nothing preventing some of the wheels from spinning while trying to loosen a tight lug nut which makes it extremely difficult.
Don’t remove them or loosen them much. You really just want to break the hard grip they have without allowing the wheel assembly to move around.
6. Jack Up The Vehicle And Place Jack Stands
It’s important to place your jack and jack stands in the appropriate locations. Your owner’s manual will have instructions for where jacks and jack stands are designed to be used.
Failure to use the proper jacking points can cause damage to your car or truck. It can also lead to your vehicle falling off the jack or jack stands and causing damage or doing you harm.
Before beginning to jack up the vehicle, place wheel chocks on the wheels that won’t be elevated as it is lifted to prevent your car or truck from rolling. You can’t rely on the emergency brake, manual transmission gearing, or parking pawl from preventing rollaway in all conditions. Some wheels can freely spin despite these all being engaged.
Depending on the location of the jacking point of your specific vehicle, place jack stands at the appropriate locations and slowly lower your car or truck down onto the stands. Make sure the stands are secure before moving on to the next jack stand.
7. Remove The Lug Nuts And Wheels
With all jack stands in place and the vehicle in the air, remove the lug nuts and wheels. Be sure to keep track of the lug nuts so they don’t get misplaced or put somewhere they can accidentally get kicked and lost.
8. Place Wheels Where They Will Be Rotated
Depending on the rotation pattern appropriate for your vehicle, move the wheels from their current location to the new location and place them within easy reach so they can be remounted.
9. Put Wheels On And Finger-Tighten Lug Nuts
Remount each wheel at its new position and tighten the lug nuts as much as you can with your fingers. The goal is to keep the wheels from wobbling and for them to stay flush against the hub when the vehicle is lowered back down.
10. Remove Jack Stands And Lower Vehicle
Reverse the procedure you used to place the jack stands. Be careful when lowering the vehicle back down and ensure that the jack stands are completely clear. Also, make sure no tools or other items will get pinned beneath the tires while lowering.
11. Torque All Lug Nuts
Now that all four wheels are on the ground you can properly tighten the lug nuts. Lug nuts should be tightened with a torque wrench to ensure they are mounted properly.
The vehicle owner’s manual will specify the required torque setting for your torque wrench to ensure the lug nuts are not tightened too much. Tightening lug nuts beyond the vehicle manufacturer’s specification can warp brake rotors and damage the lug nuts, studs, or hub.
12. Reinstall Wheel Covers
Once all wheels have been properly torqued it’s time to replace any wheel covers, hub caps, lug nut covers, or other decorative pieces that were removed before removing the wheel assemblies.
13. Test Drive To Ensure Vehicle Drives Properly
Take your car or truck for a short, low-speed test drive to make sure you don’t hear any unusual noises or feel any unusual vibrations.
If there are any problems retrace each of the steps to make sure they were followed correctly.
14. Relearn TPMS Sensor Positions (If Necessary)
Finally, some people may find a need to reset the TPMS so that it knows which tire is which so that it properly reports the pressure in each tire to the TPMS system.
TPMS systems that can detect the pressure of each individual tire (called Direct TPMS) need to know which corner the sensor is mounted on to correctly report the pressures.
Some systems are able to sort this out automatically without you needing to do anything. Others will need a little help. Unfortunately, there is no standard process that is used between all of the different vehicle manufacturers and TPMS systems.
You’ll need to either check your owner’s manual or do a little googling to figure out what the unique process is for your car or truck. We recommend understanding this step thoroughly before attempting to rotate your tires yourself.
For some, this will not be an issue. For others, it could be a serious hassle that you’ll need to plan around.
Resources
Below are some links you may find helpful when learning about tires
- Tire Rotation: How and why to rotate your tires – Bridgestone
- Tire Rotation: How to rotate tires – Michelin
Final Thoughts
It’s relatively easy to rotate tires at home if you have the proper equipment and know the appropriate tire rotation pattern to use.
It’s important to use a proper jack and jack stands for your safety and to prevent potential damage to your vehicle.
Read your owner’s manual to make sure you follow any additional requirements that they may recommend.