Imagine you’ve used Fix-A-Flat to handle a sudden tire puncture, only to realize that what comes next is just as important: removing it. Tire techs hate this stuff for good reason: it’s a nightmare to clean up, but we can share some helpful tips.
How To Remove Fix-A-Flat From Tires
To remove Fix-A-Flat from a tire, thoroughly deflate the tire, expel the sealant, and then clean the interior with a tire cleaner or soap solution, ensuring all residue is removed.
In this article, we provide a comprehensive guide on safely and effectively removing Fix-A-Flat from your tire, conducting a post-removal inspection, and exploring alternative emergency tire repair options.
Understanding Fix-A-Flat
Welcome to the world of tire emergencies, where Fix-A-Flat often comes to the rescue. But what exactly is this product, and how does it influence your tire’s health and functionality? Let’s break it down:
What is Fix-A-Flat?
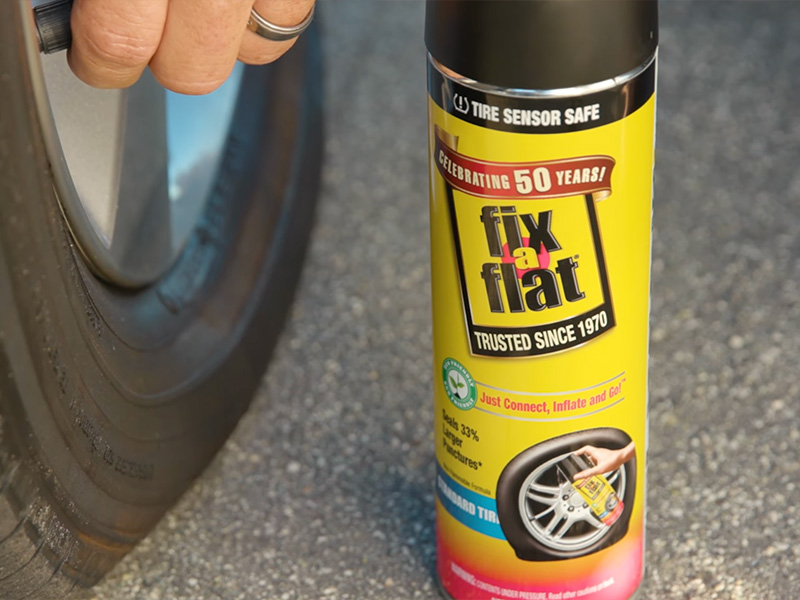
Fix-A-Flat is a popular emergency tire repair solution, known for its convenience and efficiency. It’s a temporary fix, designed to get you back on the road quickly when you’re dealing with a flat tire. But how does it pull off this quick-fix magic?
Let’s dive into how Fix-A-Flat works to get a clearer picture.
Common Concerns with Fix-A-Flat
When using Fix-A-Flat, a few questions often pop up:
- How Long Does Fix-A-Flat Take to Harden?
- The hardening time can vary, but generally, Fix-A-Flat starts to work immediately upon application and continues to solidify as you drive. For a more detailed timeline, check out our article on how long Fix-A-Flat takes to harden.
- Will Fix-A-Flat Ruin My Tire?
- This is a bit of a gray area. Fix-A-Flat is a temporary solution and not meant for long-term use. If left inside the tire for too long, it could potentially cause issues. It’s always best to have your tire professionally inspected and repaired as soon as possible.
- Does Fix-A-Flat Ruin Your Tire Sensors?
- There’s a risk that Fix-A-Flat can clog or damage tire pressure sensors. While not a guaranteed outcome, it’s something to be mindful of, especially in modern vehicles with sensitive tire pressure monitoring systems.
Final Thoughts on Fix-A-Flat
Remember, while Fix-A-Flat is a handy emergency tool, it’s not a permanent solution. It’s crucial to follow up with professional tire repair or replacement to ensure your safety on the road.
Preparing for Removal
Now that you’re familiar with Fix-A-Flat and its implications, let’s roll up our sleeves and get ready to remove it from your tire.
Preparation is key, so let’s walk through the steps to ensure you’re all set for a smooth and safe removal process.
Safety First: Tools and Protective Gear
Before diving in, make sure you have the right tools and safety gear. Here’s what you’ll need:
- Protective gloves: Fix-A-Flat can be messy and potentially irritating to the skin.
- Eye protection: Safety goggles are a must to protect your eyes from any splashes.
- Adequate ventilation: Work in a well-ventilated area to avoid inhaling fumes.
Preparing Your Work Area
- Flat, stable surface: Ensure your car is parked on a level surface to prevent it from moving.
- Proper lighting: Good lighting is crucial for visibility and safety.
Removing the Tire from the Car
- Jack up the car: Use a car jack to lift the vehicle safely. Make sure you’re familiar with the jacking points on your vehicle.
- Remove the tire: Loosen the lug nuts, remove the tire, and place it in your work area.
Now that we’ve set the stage for a safe and effective removal process, the next step is to actually remove the Fix-A-Flat from your tire. This can be a bit messy, but with the right approach, it’s totally manageable.

The Removal Process
With your safety gear on and the tire either removed or ready on the car, it’s time to get down to the nitty-gritty: removing Fix-A-Flat from your tire.
This process can be a bit messy, but with these steps, you’ll manage it like a pro.
Step-by-Step Guide to Remove Fix-A-Flat from the Tire
- Draining the Tire:
- Start by deflating the tire completely. You can do this by pressing on the valve stem.
- Once deflated, gently squeeze the tire to ensure any remaining Fix-A-Flat is expelled from the valve.
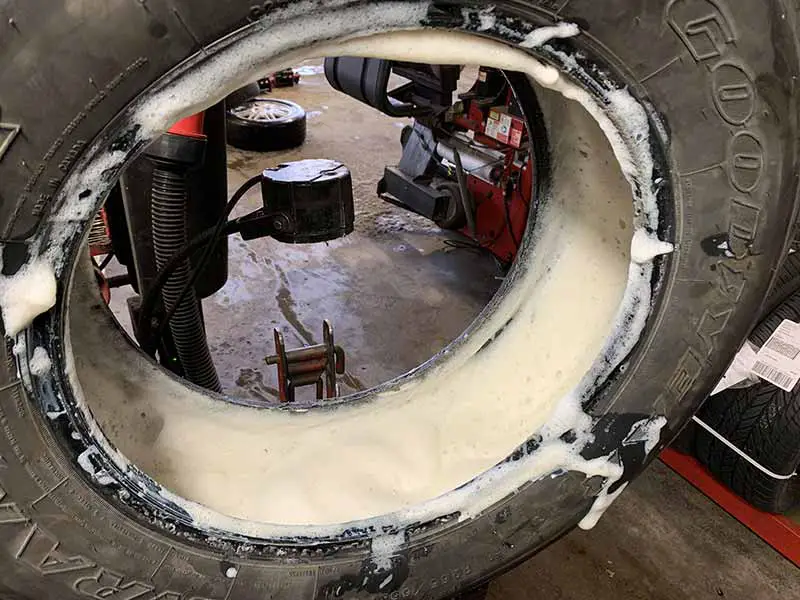
- Cleaning the Residue:
- Use a tire cleaner or a mild soap solution to clean the inside of the tire.
- A soft brush or cloth can help remove the Fix-A-Flat residue.
- Rinse thoroughly with water to ensure all the cleaner and residue are removed.
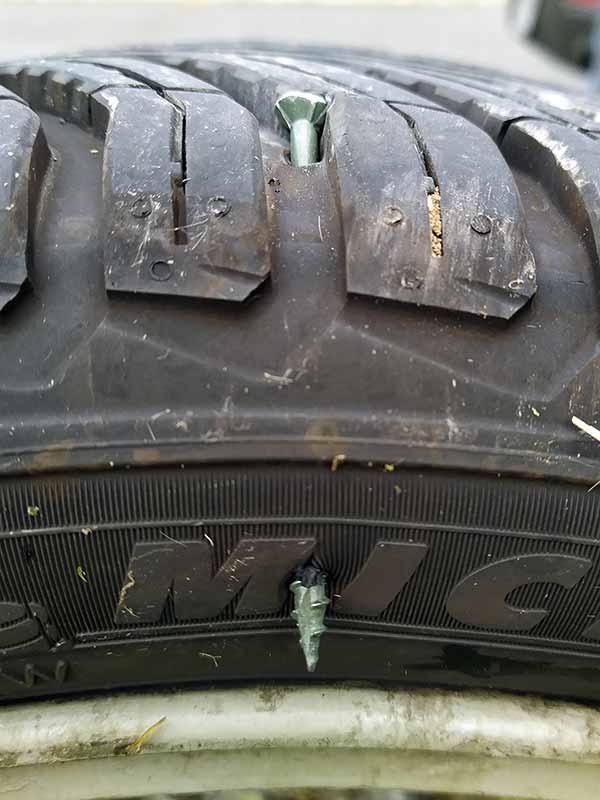
- Checking for Damage Inside the Tire:
- Inspect the inside of the tire for any signs of damage or wear.
- Pay special attention to the area around the puncture that was sealed with Fix-A-Flat.
Tips for Ensuring Complete Removal
- Be Thorough: Make sure you reach every nook and cranny inside the tire. Fix-A-Flat can hide in small spaces.
- Dry Properly: After cleaning, let the tire dry completely before re-inflation or taking it to a professional for further inspection.
- Dispose Responsibly: Remember to dispose of the Fix-A-Flat residue and cleaning materials responsibly.
Post-Removal Tire Inspection
You’ve successfully removed Fix-A-Flat from your tire—great job! But our journey doesn’t end here. It’s crucial to inspect your tire post-cleaning to ensure it’s safe for continued use.
Let’s walk through what you need to check.
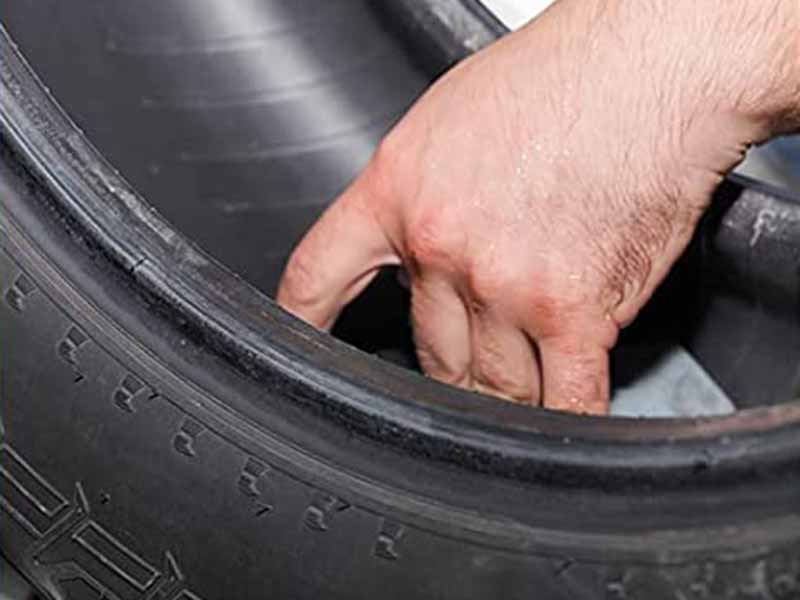
Inspecting the Tire for Damage
- Look for Physical Damage: Check the tire for any cuts, punctures, or irregular wear that might have been hidden by the Fix-A-Flat.
- Examine the Tire’s Interior: Pay close attention to the inside of the tire where the Fix-A-Flat was applied. Look for any signs of deterioration or damage.
- Check the Tire Tread: Ensure the tread is evenly worn and above the minimum legal tread depth.
Deciding Whether to Reuse or Replace the Tire
- Assess the Severity of Damage: Minor wear or superficial damage might not require immediate tire replacement, but anything more significant should be taken seriously.
- Consult with Professionals: If you’re unsure about the condition of your tire, it’s always wise to consult with a tire professional. They can provide a more thorough inspection and advice.

Aftermarket Spare Tires Are Great Alternatives If You Have The Room
Alternatives to Fix-A-Flat
While Fix-A-Flat is a popular choice for quick tire fixes, it’s not the only option out there. Understanding the alternatives can help you make an informed decision the next time you face a tire emergency.
Let’s explore some of these options.
Overview of Alternative Emergency Tire Repair Options
- Tire Plug Kits: These kits allow you to physically plug a hole in the tire’s tread. They’re a bit more labor-intensive but can be more reliable than sealants.
- Tire Patches: Applied to the inside of the tire, patches can offer a more permanent fix compared to plugs, but they require tire removal and are more complex to apply.
- Spare Tires: Whether it’s a full-size spare or a temporary “donut,” having a spare tire is a traditional and reliable solution.
Pros and Cons of These Alternatives
- Tire Plug Kits:
- Pros: More durable than sealants; don’t interfere with tire sensors.
- Cons: Require some physical effort and skill to use correctly.
- Tire Patches:
- Pros: Offer a more permanent repair compared to plugs and sealants.
- Cons: More complex to apply; require professional tools and skills.
- Spare Tires:
- Pros: Provide the most reliable solution for getting back on the road.
- Cons: Require physical space for storage; “donuts” have speed and distance limitations.
Making the Right Choice for Your Situation
- Consider the severity and location of the puncture.
- Assess your comfort level with using tools and performing repairs.
- Evaluate the availability of space for a spare tire in your vehicle.
Resources
Below are some links you may find helpful when learning about tires:
- Tire safety tips – National Highway Traffic Safety Administration (NHTSA)
- How to maintain your tires – Consumer Reports
Final Thoughts
Navigating the aftermath of using Fix-A-Flat can be as crucial as the initial emergency repair. Understanding how to remove this sealant properly, inspect your tire for further damage, and consider alternative repair options is essential for maintaining your vehicle’s safety and performance.
While DIY methods are helpful, consulting with tire professionals for complex issues is always advisable. This guide aims to empower you with the knowledge to handle tire emergencies confidently while emphasizing the importance of regular tire maintenance and safety checks.
Good luck and happy motoring.