Changing a tire is a fundamental skill every driver should possess, whether it’s for a punctured tire, flat tire, or you simply want to rotate your tires yourself. But when it comes to electric vehicles, especially a brand as iconic as Tesla, there are unique considerations to keep in mind. If you’ve ever wondered about the intricacies of handling a Tesla tire, you’re not alone.
Can You Change A Tesla Tire Yourself?
Yes, you can change a Tesla tire yourself. The basic process is the same, however you’ll need Tesla pucks for your jack to avoid damaging the underbody, torque the lug nuts to 129 lb. ft (175 Nm), and know the process to reset the TPMS sensor positions if you’ve rotated the Tesla tire positions.
In this article, we’ll delve deep into the world of Tesla tires, exploring their distinct characteristics, the tools required for a change, a step-by-step guide to the process, and common mistakes to avoid. We’ll also provide a comprehensive post-change checklist to ensure your Tesla’s optimal performance on the road.
Let’s take a closer look.

Understanding Tesla Tires: Are They Different?
Tesla, a leading name in the electric vehicle industry, has made significant strides in automotive technology. One of the areas that often gets overlooked, but is of paramount importance, is the tires designed for Tesla vehicles. So, how are Tesla tires different from conventional tires? Let’s delve deeper.
What Makes Tesla Tires Unique?
- Acoustic Comfort: Tesla tires often come with foam lining inside, known as an acoustic foam. This foam is designed to:
- Reduce road noise, ensuring a quieter ride.
- Enhance the overall driving experience, especially given the quiet nature of electric vehicles.
- Load Bearing Capacity: Given the added weight of batteries in electric vehicles:
- Tesla tires are built to handle a higher load.
- They have a reinforced sidewall to support the car’s weight without compromising performance.
- Rolling Resistance: To maximize efficiency:
- Tesla tires are designed with low rolling resistance.
- This ensures that the car can travel longer distances on a single charge.
Performance and Longevity
- Tread Patterns: Tesla tires often have unique tread patterns that:
- Offer better grip, especially during high-speed cornering.
- Ensure efficient water dispersion to reduce hydroplaning risks.
- Wear Indicators: Some Tesla tires come with wear indicators that provide drivers with a clear visual cue when it’s time for a replacement.
- Longevity: Due to the unique demands of electric vehicles, Tesla tires:
- Are designed to wear out evenly.
- Might have a different lifespan compared to conventional tires, depending on driving habits and conditions.
Compatibility with Tesla Models
Different Tesla models might have specific tire requirements. For instance:
- Tesla Model 3: Often comes with 18″, 19″, or 20″ wheels. The tires for these sizes are designed to offer a balance between performance and comfort.
- Tesla Model Y: Being a larger vehicle, it might require tires that offer more stability, especially at higher speeds.

Tesla Jack Pucks/Pads
Preparing to Change a Tesla Tire
Changing a tire on any vehicle requires preparation, and with Tesla’s unique design and features, there are specific considerations to keep in mind. Here’s a step-by-step guide to ensure you’re well-prepared.
Safety First
Before diving into the process, it’s crucial to prioritize safety:
- Parking: Ensure the vehicle is parked on a flat, stable surface away from traffic.
- Emergency Brake: Always engage the emergency brake to prevent any unwanted movement.
- Warning Signals: If you’re on the side of a road, turn on your hazard lights to alert other drivers.
Checking Tire Pressure
- Importance: Before removing the tire, it’s essential to check its pressure. An under-inflated or over-inflated tire can pose challenges during the changing process.
- Tesla’s TPMS: Tesla vehicles come equipped with a Tire Pressure Monitoring System (TPMS) that provides real-time data on tire pressures. Ensure you consult this system to:
- Check the pressure of the tire you’re about to change.
- Monitor the pressures of the remaining tires for any discrepancies.
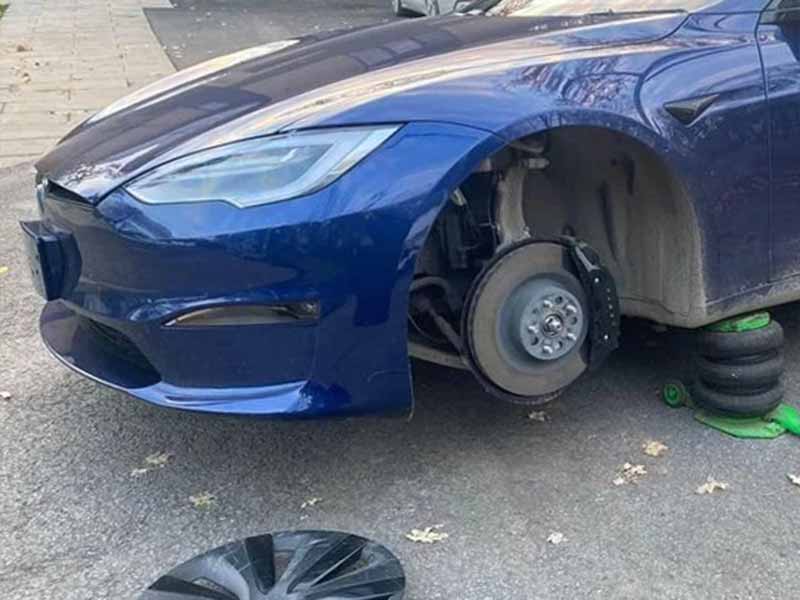
Identifying the Affected Tire
- Visual Inspection: Look for obvious signs of damage like punctures, cuts, or bulges on the tire wall.
- Driving Symptoms: If the tire damage isn’t visible, think back to any unusual driving symptoms like vibrations, pulling to one side, or an activated TPMS warning light.
Gathering Necessary Tools
Before starting the tire-changing process, gather all the necessary tools:
- Jack: To lift the vehicle. Ensure it’s compatible with Tesla’s weight and design.
- Lug Wrench: For removing and tightening the lug nuts.
- Torque Wrench: For tightening the lug nuts to the specified amount.
- Tesla Pucks: These are essential lifting pads that ensure the car’s battery pack isn’t damaged when jacking up the vehicle.
- Spare Tire: Ensure the replacement tire is in good condition and has the proper tire pressure.
Additional Helpful Equipment
While not strictly necessary, these items can make the tire-changing process smoother:
- Gloves: Protect your hands from dirt and potential sharp objects.
- Flashlight: Useful if you’re changing the tire in low-light conditions.
- Wheel Chocks: These can be placed behind the remaining tires to prevent any unwanted movement of the vehicle.
- Tire Pressure Gauge: While Tesla’s have an in-built TPMS, a manual gauge can be a handy backup to check tire pressures.
Specific Considerations for Tesla Models
- Model Y vs. Model 3: While the fundamental process remains the same, always refer to the vehicle’s manual. Different models might have specific jacking points or require additional precautions.

Step-by-Step Guide to Changing a Tesla Tire
Changing a tire on a Tesla involves a series of steps that ensure safety and efficiency. While the process shares similarities with changing tires on traditional vehicles, there are Tesla-specific considerations to keep in mind. Here’s a detailed guide to help you through the process.
1. Safety Precautions
Before starting, take the necessary safety measures:
- Position the Vehicle: Ensure the Tesla is on a flat, stable surface.
- Engage the Parking Brake: This prevents the car from moving during the process.
- Turn on Hazard Lights: Especially important if you’re on the side of a road.
2. Loosening the Lug Nuts
- Do Not Remove Completely: Using the lug wrench, slightly loosen each lug nut. Do not remove them entirely at this stage.
- Pattern: It’s advisable to use a star pattern when loosening to ensure even pressure.
3. Positioning the Jack and Lifting the Vehicle
- Locate Jacking Points: Refer to the Tesla’s user manual to find the specific jacking points for your model.
- Place the Tesla Pucks: Insert the Tesla pucks (lifting pads) into the jacking points to protect the battery and undercarriage.
- Lift the Vehicle: Using the car jack, slowly lift the vehicle until the tire is off the ground.
4. Removing the Tire
- Remove Lug Nuts: Now, completely remove the previously loosened lug nuts.
- Take Off the Tire: Gently pull the tire towards you, ensuring you have a firm grip, and set it aside.
5. Installing the Replacement Tire
- Position the Tire: Align the holes of the replacement tire with the wheel hub’s lug bolts.
- Hand Tighten Lug Nuts: Initially, hand-tighten the lug nuts to ensure proper alignment.
- Tighten with Lug Wrench: Using the lug wrench, tighten the lug nuts in a star pattern to ensure even pressure. Do not over-tighten.
6. Lowering the Vehicle
- Slowly Lower: Carefully lower the vehicle using the car jack until it’s fully on the ground.
- Final Tightening with Torque Wrench: All vehicle manufacturer’s guidelines for tightening lug nuts include torque specifications to avoid damage and ensure lug nuts don’t loose. The Tesla lug nut torque specification is 129 lb. ft (175 Nm).
7. Post-Change Checks
- Check Tire Pressure: Ensure the new tire has the proper tire pressure. Adjust if necessary.
- TPMS Reset: Some Tesla models might require a TPMS reset after a tire change. Refer to the user manual for guidance.

Torque Wrench
Post Tire Change Checklist
After changing a tire on your Tesla, it’s crucial to follow a post-change checklist to ensure safety and optimal performance. This checklist will guide you through the essential steps to take once the new tire is installed.
1. Double-Check Lug Nuts
- Ensure Tightness: Even if you’ve tightened the lug nuts after lowering the vehicle, it’s a good practice to double-check. Ensure they are secure and evenly tightened.
- Recheck After Some Distance: After driving for about 50 miles, recheck the lug nuts to ensure they haven’t loosened.
2. Monitor Tire Pressure
- Initial Check: Use the Tire Pressure Monitoring System (TPMS) to check the pressure of the newly installed tire. Ensure it matches the recommended pressure for your Tesla model.
- Regular Monitoring: For the next few days, keep an eye on the tire pressure. A significant drop could indicate a problem with the replacement tire or its installation.
3. Inspect for Vibrations or Unusual Noises
- Drive Test: Take your Tesla for a short drive. Pay attention to any unusual vibrations or noises, which could indicate an issue with the tire’s balance or alignment.
- Address Immediately: If you notice any abnormalities, it’s essential to address them immediately, either by revisiting the installation process or consulting a tire shop.
4. Tire Rotation Consideration
- Importance: Regular tire rotation ensures even tire wear, extending the lifespan of your tires.
- Schedule: If you replaced only one tire, consider scheduling a tire rotation, especially if the other tires have significantly more wear.
5. Store the Damaged Tire Properly
- Assessment: Before discarding, assess the damaged tire. Some punctures or damages might be repairable.
- Storage: If you’re keeping the damaged tire, store it in a cool, dry place away from direct sunlight.
6. Update Your Spare
- Replacement: If you used your spare tire as the replacement, consider getting a new spare. It’s always good to have a backup.
- Check Condition: If you didn’t use the spare, it’s still a good time to check its condition and pressure.
7. Visit a Tire Shop if Unsure
- Professional Assessment: If you have any doubts about your tire-changing process or the tire’s condition, it’s wise to visit a tire shop for a professional assessment.
- Alignment Check: Consider getting a wheel alignment, especially if you notice uneven tire wear or if your vehicle pulls to one side.
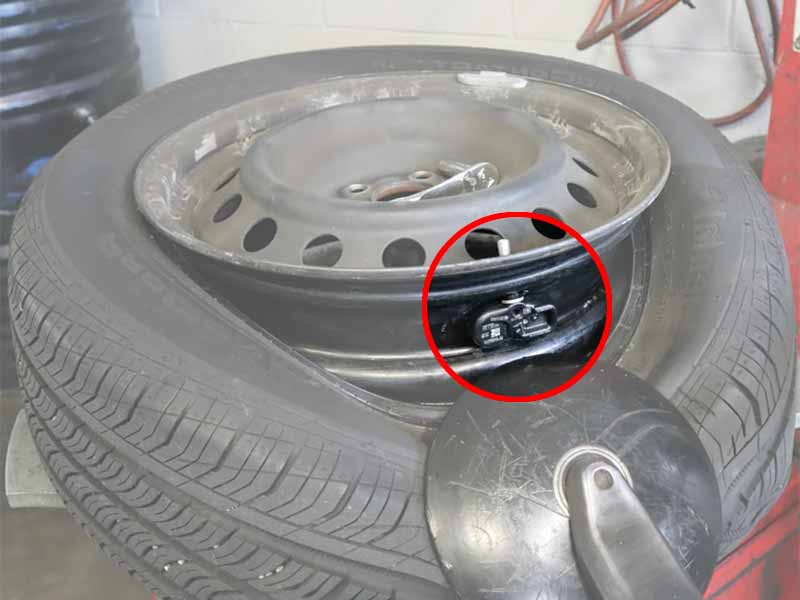
Updating TPMS Sensor Positions on a Tesla
The Tire Pressure Monitoring System (TPMS) in a Tesla is a crucial feature that monitors the air pressure inside the pneumatic tires, providing real-time information to the driver. When you rotate or replace tires, it’s essential to update the TPMS sensor positions to ensure accurate readings. Here’s a guide on how to do it.
Why Update TPMS Sensor Positions?
- Accurate Readings: After rotating or changing tires, the TPMS needs to know the new position of each tire to provide accurate pressure readings for each specific location (front left, front right, rear left, rear right).
- Safety: Accurate TPMS readings ensure that you’re alerted promptly if any tire’s pressure drops below or rises above the recommended levels.
How to Update TPMS Sensor Positions on a Tesla:
- Access the ‘Service’ Menu: On your Tesla’s touchscreen, navigate to the ‘Service’ menu.
- Select ‘TPMS’ Option: Within the ‘Service’ menu, you’ll find an option labeled ‘TPMS’. Tap on it.
- Enter TPMS Reset Mode: There should be an option to reset or relearn the TPMS sensors. Select this option.
- Follow On-Screen Instructions: The system might prompt you to drive your Tesla for a short distance or remain stationary. This process allows the car to detect and relearn the new positions of the TPMS sensors.
- Confirmation: Once the system has successfully relearned the sensor positions, you’ll receive a confirmation message on the touchscreen.
- Check for Accuracy: After the reset, it’s a good practice to check the tire pressure readings on the display to ensure they correspond with the actual positions of the tires.
Potential Issues and Solutions:
- No Immediate Update: Sometimes, the system might take a while to recognize the new sensor positions. If this happens, consider driving your Tesla for a few more miles.
- Persistent Errors: If the TPMS still shows errors or doesn’t update the positions correctly, there might be an issue with one or more sensors. In such cases, it’s advisable to consult a Tesla service center.
Common Mistakes and How to Avoid Them
Changing a tire, especially on a unique vehicle like a Tesla, can come with its set of challenges. While the process might seem straightforward, there are common mistakes that individuals often make. Let’s explore these pitfalls and provide guidance on how to avoid them.
1. Incorrect Jack Placement
- Mistake: Placing the jack in an area not designed to bear the vehicle’s weight can lead to damage, especially to the battery pack in a Tesla.
- Solution: Always refer to the Tesla’s user manual to identify the correct jacking points and use Tesla pucks (lifting pads) to ensure protection.
2. Ignoring Tire Pressure
- Mistake: Installing the replacement tire without checking its pressure can lead to poor performance and potential safety risks.
- Solution: Always check the tire pressure of the replacement tire before and after installation. Use the TPMS and adjust the pressure as necessary.
3. Over-tightening Lug Nuts
- Mistake: Using excessive force when tightening lug nuts can warp brake rotors or damage the wheel.
- Solution: Use a torque wrench if available, or ensure you’re applying even pressure in a star pattern when tightening lug nuts. Recheck after driving a short distance.
4. Neglecting the Sidewall
- Mistake: Not inspecting the tire wall for damages or bulges, which can be signs of internal damage or potential tire failure.
- Solution: Always conduct a thorough visual inspection of the entire tire, including the tire wall, before and after installation.
5. Not Testing After Installation
- Mistake: Assuming the job is done after installing the tire without testing the vehicle.
- Solution: Always take a short test drive after changing the tire. Monitor for any unusual vibrations, noises, or driving behaviors.
6. Ignoring TPMS Warnings
- Mistake: Overlooking the warnings or indicators from Tire Pressure Monitoring Systems.
- Solution: Always address TPMS warnings promptly. If the system indicates a discrepancy after a tire change, inspect the tire or consult a professional.
Resources
Below are some links you may find helpful when learning about tires
Final Thoughts
Changing a Tesla tire, while similar in many respects to traditional vehicles, comes with its set of unique challenges and considerations.
From understanding the distinct features of Tesla tires and gathering the right tools, to following a meticulous step-by-step process and being aware of common pitfalls, it’s essential to approach the task with knowledge and caution.
By adhering to the guidelines and insights provided in this article, not only can you ensure a successful tire change, but you can also guarantee the safety and longevity of your Tesla’s journey on the road.
Good luck and happy motoring.