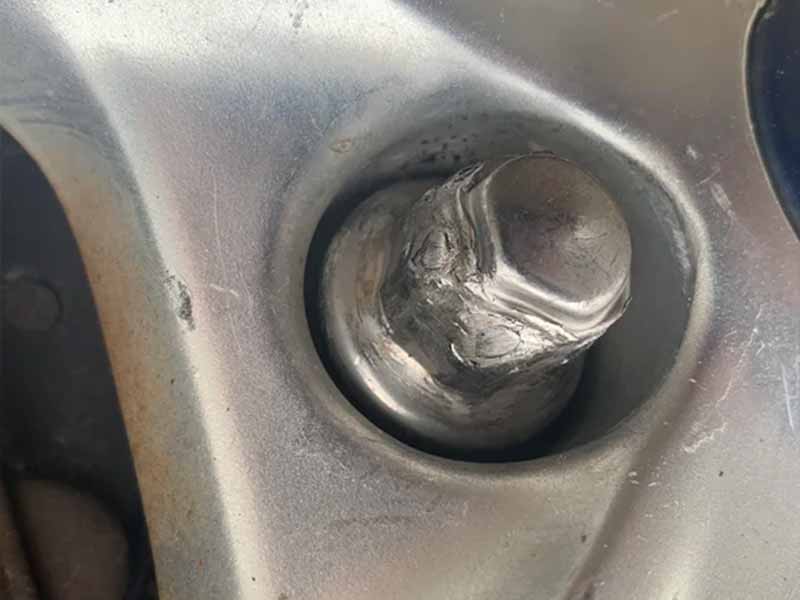
Ever found yourself stranded on the side of the road, staring at a stripped lug nut that just won’t budge? You’re not alone. Stripped lug nuts are a common but frustrating problem that can turn a simple tire change into a full-blown headache.
How To Remove A Stripped Lug Nut
To remove a stripped lug nut, you can use standard tools like a lug wrench and breaker bar, specialized tools like lug nut extractors, or even DIY methods using household items. Each method has its pros and cons, and the best approach depends on the severity of the stripping and the tools you have available.
In this article, we’ll walk you through various methods to remove a stripped lug nut, from using standard and specialized tools to at-home solutions.
Let’s take a closer look.

Some Recommended Tools
Before diving into the methods for removing a stripped lug nut, it’s crucial to gather all the necessary tools. Having the right tools on hand will not only make the job easier but also minimize the risk of further damaging the lug nut or wheel.
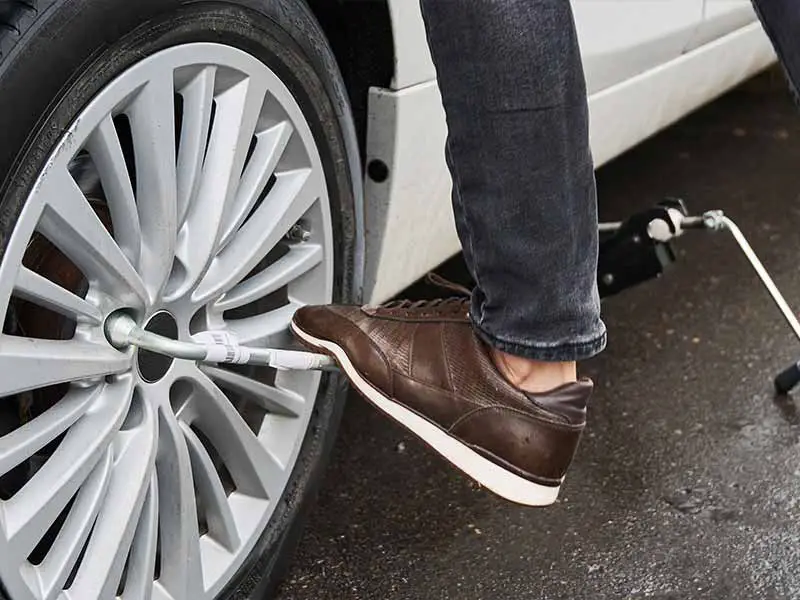
Lug Wrench
- A lug wrench is a must-have for any tire-related task.
- Make sure to use the correct size that fits your vehicle’s lug nuts snugly to avoid stripping them further.
Breaker Bar
- A breaker bar provides extra leverage, making it easier to loosen stuck or stripped lug nuts.
- It’s especially useful when you don’t have access to an impact wrench.
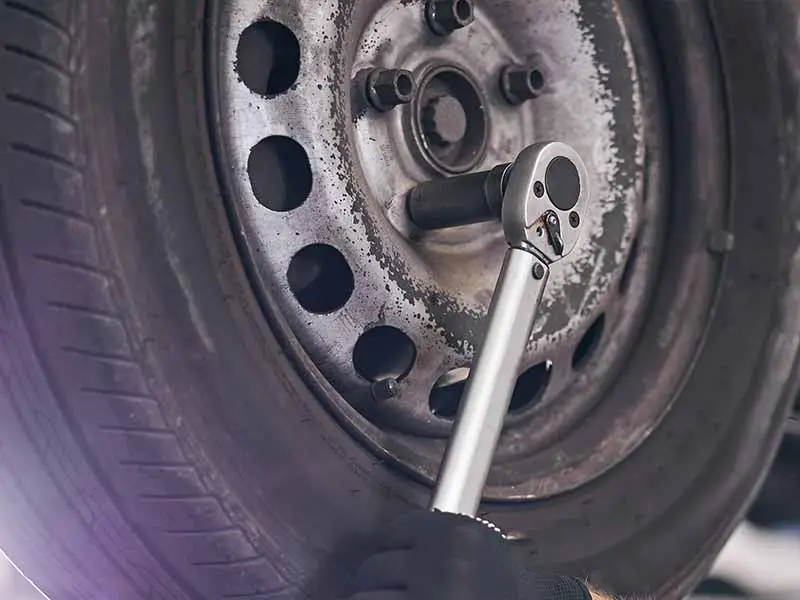
Torque Wrench
- A torque wrench allows you to apply a specific amount of force, helping to prevent over-tightening.
- Always set it to the manufacturer’s recommended torque settings for your vehicle.
Specialized Tools for Stripped Lug Nuts
Sometimes, standard tools won’t do the trick, and you’ll need something designed specifically for the problem at hand.
Lug Nut Extractor
- A lug nut extractor is designed to grip onto stripped lug nuts, making them easier to remove.
- These come in various types, including reverse-threaded sockets and ones with internal ridges for better grip.
Extractor Socket
- An extractor socket is another specialized tool that grips onto rounded-off or damaged lug nuts.
- It’s a good alternative to a lug nut extractor and is often used in professional settings.
Impact Wrench
- While not necessary for everyone, an impact wrench can make the job quicker and easier.
- If using an impact wrench, be cautious not to apply too much torque, as this can worsen the stripping.
Additional Supplies
Penetrating Oil
- Penetrating oil can help loosen rusted or stuck lug nuts.
- Apply it generously and let it sit for several minutes before attempting to remove the lug nut.
Safety Gear
- Always wear safety goggles to protect your eyes from flying debris.
- Gloves can also provide a better grip and protect your hands.
Optional but Helpful
Rubber Mallet
- A rubber mallet can be used to tap the tools gently, helping them seat better on the stripped lug nut.
Pipe for Leverage
- A long pipe can be fitted over the handle of your breaker bar or lug wrench to provide additional leverage.
Method 1: Using Standard Tools
When you find yourself with a stripped lug nut, your first instinct might be to grab the standard tools you have in your garage. This section will guide you through the process of removing a stripped lug nut using just those basic tools. This method is particularly useful if you don’t have access to specialized tools or an impact wrench.
Step 1: Safety First
- Before you start, make sure your vehicle is on a stable surface.
- Use wheel chocks to secure the other wheels and prevent the vehicle from moving.
- Put on your safety gear, including goggles and gloves.
Step 2: Apply Penetrating Oil
- Generously spray penetrating oil on the stripped lug nut.
- Allow it to sit for at least 15-20 minutes to loosen any rust or grime.
Step 3: Hand-Tighten First
- Attempt to hand-tighten the lug nut onto the lug bolt.
- This helps realign any misaligned threads and makes it easier to use tools later.
Step 4: Use the Lug Wrench
- Fit the lug wrench onto the stripped lug nut as securely as possible.
- Apply steady pressure in the counterclockwise direction to try and loosen the lug nut.
- If the lug wrench slips, reposition it and try again.
Step 5: Employ the Breaker Bar
- If the lug wrench isn’t providing enough leverage, switch to a breaker bar.
- Attach the correct socket to the breaker bar.
- Apply steady, even pressure to loosen the lug nut.
Step 6: Check for Movement
- Periodically check to see if the lug nut has started to move.
- If it has, you may switch back to the lug wrench for easier handling.
Step 7: Remove the Lug Nut
- Once the lug nut is loose enough, you should be able to remove it by hand.
- If it’s still stuck, continue using the breaker bar or lug wrench until it comes off.
Tips for Using Standard Tools
- Always keep the tools aligned properly to avoid causing further damage to the lug nut.
- If the lug nut is severely stripped, you may need to tap the socket onto it gently with a rubber mallet for a better fit.
- Never use excessive force, as this can worsen the stripping or damage the wheel.

WD-40 Penetrating Oil
Method 2: At-Home Solutions
Sometimes you might find yourself without the standard or specialized tools typically used for removing stripped lug nuts. Don’t worry; there are some at-home solutions that can come to your rescue. This section will guide you through the process of removing a stripped lug nut using items commonly found around the house.
Step 1: Safety Precautions
- As always, safety comes first. Make sure your vehicle is on a stable surface and that the other wheels are secured with wheel chocks.
- Put on safety goggles and gloves to protect yourself.
Step 2: Assess the Situation
- Take a close look at the stripped lug nut to determine the extent of the damage.
- This will help you decide which at-home method to use.
Step 3: Penetrating Oil Substitute
- If you don’t have penetrating oil, you can use a mixture of dish soap and water, or even cola, to help loosen the lug nut.
- Apply generously and wait for about 20 minutes.
Step 4: The “Hammer and Chisel” Method
- Take a chisel and position its tip on the stripped lug nut.
- Use a hammer to tap the chisel, creating a new groove on the lug nut.
- Insert a flat-head screwdriver into the groove and attempt to turn the lug nut counterclockwise.
Step 5: The “Socket and Hammer” Method
- Find a socket that is slightly smaller than the stripped lug nut.
- Place the socket over the lug nut and tap it gently with a hammer until it fits snugly.
- Attach a breaker bar or ratchet to the socket and turn counterclockwise to remove the lug nut.
Step 6: The “Belt Wrench” Method
- Wrap a leather belt tightly around the stripped lug nut.
- Use the belt as a makeshift wrench, pulling it counterclockwise to loosen the lug nut.
Step 7: The “Pipe Wrench” Method
- If you have a pipe wrench, its adjustable jaws can grip onto the stripped lug nut.
- Turn the wrench counterclockwise to remove the lug nut.
Tips for At-Home Methods
- Always proceed with caution to avoid causing further damage to the lug nut or wheel.
- These methods are generally more time-consuming and may require more effort.
- If one method doesn’t work, you can try another or combine methods for better results.
Method 3: Using a Chisel
When dealing with a stubborn, stripped lug nut, sometimes you need to bring out the heavy artillery. One such tool that can be incredibly effective is a chisel. This section will guide you through the process of using a chisel to remove a stripped lug nut, a method often used by professionals and DIY enthusiasts alike.
Step 1: Safety Measures
- Ensure your vehicle is on a stable surface and that the other wheels are secured with wheel chocks.
- Put on your safety goggles and gloves to protect yourself from flying metal shards and other debris.
Step 2: Prepare the Area
- Clean the area around the stripped lug nut to remove any dirt, rust, or grime.
- Apply penetrating oil to the lug nut and let it sit for about 20 minutes to loosen it up.
Step 3: Position the Chisel
- Place the tip of the chisel on the stripped lug nut, aiming for a point where you can create a new groove or catch onto an existing one.
- Make sure the chisel is positioned in such a way that it will turn the lug nut counterclockwise when struck.
Step 4: Strike the Chisel
- Using a hammer, strike the end of the chisel firmly but carefully.
- The goal is to create a groove or notch that you can use to turn the lug nut.
Step 5: Turn the Lug Nut
- Once the groove is made, angle the chisel into it.
- Strike the chisel in a manner that turns the lug nut counterclockwise.
- Continue this process until the lug nut starts to move.
Step 6: Assess and Continue
- Periodically stop to assess your progress.
- If the lug nut is starting to turn, you can either continue with the chisel or switch to a lug wrench or breaker bar for easier handling.
Step 7: Remove the Lug Nut
- Once the lug nut is sufficiently loose, remove it by hand or with a lug wrench.
- If it’s still stuck, you may need to continue using the chisel or switch to another method.
Tips for Using a Chisel
- Always strike the chisel carefully to avoid slipping and causing injury or further damage.
- Make sure the chisel is sharp and in good condition for the best results.
- If the chisel method is not working, it may be time to try another method or seek professional help.

Lug Nut Extrator
Method 4: Using Specialized Tools
When standard tools and at-home methods fail, it’s time to bring in the big guns—specialized tools designed for the sole purpose of removing stripped or damaged lug nuts. This section will guide you through the process of using specialized tools like lug nut extractors and extractor sockets.
Step 1: Safety First
- As always, make sure your vehicle is on a stable surface and that the other wheels are secured with wheel chocks.
- Put on your safety goggles and gloves to protect yourself from any flying debris or metal shards.
Step 2: Pre-Treatment
- Apply penetrating oil to the stripped lug nut and let it sit for about 20 minutes.
- This helps to loosen the lug nut and makes the extraction process easier.
Step 3: Choose the Right Tool
- Based on the condition of the stripped lug nut, choose either a lug nut extractor or an extractor socket.
- Make sure the tool you choose is the correct size for your lug nut.
Step 4: Attach the Tool
- Place the lug nut extractor or extractor socket onto the stripped lug nut.
- If using an extractor socket, you may need to tap it gently with a hammer to ensure a snug fit.
Step 5: Apply Force
- Attach a breaker bar or impact wrench to the extractor tool.
- Turn the tool counterclockwise, applying steady and even pressure.
Step 6: Monitor Progress
- Keep an eye on the lug nut as you turn the tool.
- If the lug nut starts to move, continue with the process until it’s loose enough to remove.
Step 7: Remove the Lug Nut
- Once the lug nut is sufficiently loose, you can remove it by hand or with a standard lug wrench.
- If the lug nut is still stuck, you may need to repeat the process or consider another method.
Tips for Using Specialized Tools
- Always read the manufacturer’s instructions for the specialized tool you’re using. Different tools may have specific usage guidelines.
- Never force the tool onto the lug nut, as this can cause further damage.
- If using an impact wrench, be cautious with the amount of torque you apply to avoid worsening the problem.
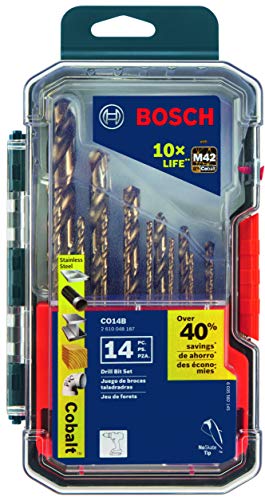
Cobalt Drill Bits
Method 5: Drilling Out the Lug Nut and Stud
When all else fails, or if the lug nut is severely stripped and stuck, drilling it out may be your last resort. This method involves using specialized drill bits to remove both the lug nut and the stud, which will then need to be replaced. This is a more advanced technique and should be approached with caution.
Step 1: Safety Measures
- Ensure your vehicle is on a stable surface and that the other wheels are secured with wheel chocks.
- Put on your safety goggles and gloves to protect yourself from metal shards and hot oil.
Step 2: Prepare the Drill and Bits
- Use a cobalt drill bit, which is designed to cut through hard metals.
- If you’re new to this, consider buying a set of cobalt bits of varying sizes.
Step 3: Center Punch the Stud
- Use a center punch to create a small indentation in the middle of the lug stud.
- This will help guide the drill bit and prevent it from wandering.
Step 4: Apply Cutting Oil
- Use cutting oil or a similar lubricant to cool the drill bit and make the drilling process smoother.
- You can either dip the bit in oil or have someone apply it while you’re drilling.
Step 5: Start Drilling
- Start with a small bit and a fast drill speed to create a pilot hole.
- Gradually switch to larger bits and reduce the drill speed as you go deeper.
Step 6: Apply Pressure and Monitor Speed
- Apply steady pressure on the drill but keep the speed slow to avoid breaking the bit or damaging its tip.
- If the bit gets stuck, do not force it. Reverse the drill and try again.
Step 7: Break and Remove the Stud
- Once you’ve drilled through most of the stud, you can use force, like kicking the tire, to break the stud the rest of the way.
- Remove any remaining pieces of the lug nut and stud.
Step 8: Replace the Lug Stud
- After successfully drilling out the lug nut and stud, you’ll need to replace the lug stud.
- Follow your vehicle’s specific guidelines for this procedure.
Tips for Drilling Method
- Always use high-quality cobalt drill bits and cutting oil for the best results.
- Make sure to frequently lubricate the drill bit to prevent overheating.
- If a drill bit breaks, do not attempt to drill it out; seek professional help.

Torque Wrench
Why Do Lug Nuts Get Stripped?
First, let’s clarify what we mean by a “stripped” lug nut. A lug nut is considered stripped when the threads that help it screw onto the wheel’s lug bolt are damaged. This damage makes it difficult to either tighten or loosen the lug nut using standard tools.
Over-Tightening
- One of the most common reasons for lug nuts getting stripped is over-tightening. When too much force is applied, the threads can get damaged.
- Over-tightening often occurs when using an impact wrench that applies too much torque.
- The correct way to avoid this is by using a torque wrench set to the manufacturer’s recommended torque settings.
Incorrect Tools
- Using the wrong size lug wrench can also lead to stripped lug nuts.
- If the wrench doesn’t fit snugly, it can slip and damage the lug nut’s outer surface or threads.
- Always use the correct size and type of lug wrench for your vehicle’s lug nuts.
Cross-Threading
- Cross-threading happens when the lug nut is not aligned properly with the lug bolt as you start to screw it on.
- This misalignment damages the threads and can lead to a stripped lug nut.
- To avoid this, always hand-tighten lug nuts before using any tools. This ensures that the threads are aligned correctly.
Environmental Factors
- Rust and corrosion can weaken the metal, making it more susceptible to stripping.
- Exposure to road salt, water, and other corrosive substances can accelerate this process.
- Regularly inspect and clean your lug nuts and bolts to prevent rust and corrosion.
Wear and Tear
- Over time, the repeated process of removing and installing lug nuts can wear down the threads.
- Older lug nuts are more prone to getting stripped.
- If you notice signs of wear, it’s a good idea to replace your lug nuts.
The Role of Material Quality
- Not all lug nuts are made equal. Some are made from softer metals that are more prone to stripping.
- Always opt for high-quality lug nuts made from durable materials like hardened steel.
The Impact of Incorrect Installation
- Sometimes, lug nuts are installed at an angle or without proper alignment, which can lead to stripping over time.
- Always ensure that lug nuts are installed straight and are properly seated on the wheel.
Resources
Below are some links you may find helpful when learning about tires
- How to remove a stuck or stripped lug nut – Axle Addict
- How to remove a stripped lug nut from a tire – 1A Auto
Final Thoughts
Removing a stripped lug nut can be a challenging task, but it’s far from impossible. Whether you choose to use standard tools, specialized equipment, or even household items, the key is to approach the problem methodically and safely.
Always remember to use the correct tools and techniques to minimize further damage and consider the cost implications of each method. If all else fails, don’t hesitate to seek professional help.
Good luck and happy motoring.