Picture this: you’re about to set off on a road trip when you spot your tire with a nail stuck in it. You don’t have a spare tire but do have a tire repair kit with Fix-A-Flat tire sealant.
Do you yank the nail out or leave it in? And where does Fix-A-Flat come into the picture? We’ve all been there, and this guide will shed light on these common dilemmas.
Should I Remove The Nail From My Tire Before Using Fix-A-Flat?
Typically, you should not remove the nail from your tire before using Fix-A-Flat. It’s best to leave the nail in place and apply the tire sealant as a temporary solution, then promptly get the tire inspected and repaired at your nearest tire shop.
In this article, we will delve into the nature of tire punctures, evaluate when to remove or leave a nail in your tire, explore the use and benefits of Fix-A-Flat, and discuss its limitations.
You’ll walk away with a comprehensive understanding of how to handle a nail in your tire and how to use tire sealants effectively.
Let’s take a closer look.
No products found.Fix-A-Flat
Understanding The Nature Of Tire Punctures
As with any part of a vehicle, understanding how it functions and reacts under various conditions is crucial. This principle rings especially true when discussing tire punctures. These often unavoidable encounters with sharp objects can range from a minor inconvenience to a significant safety issue.
Different Types Of Punctures
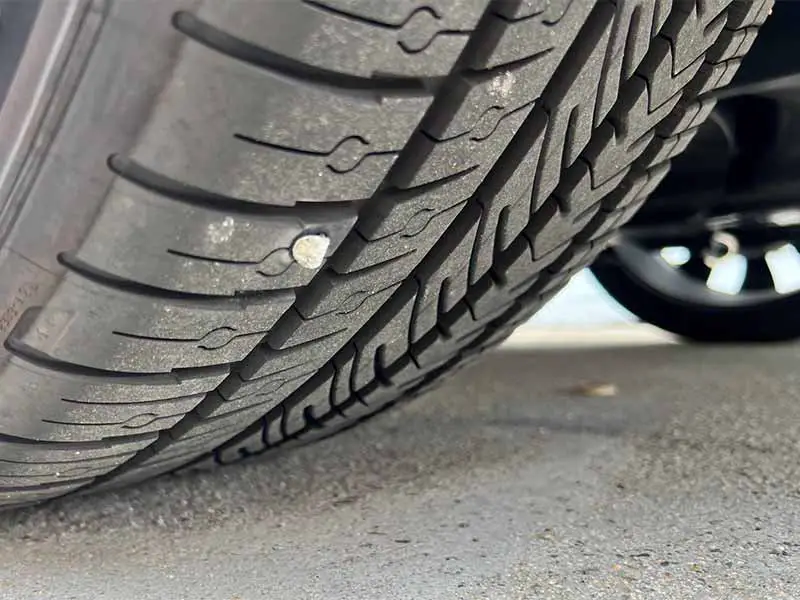
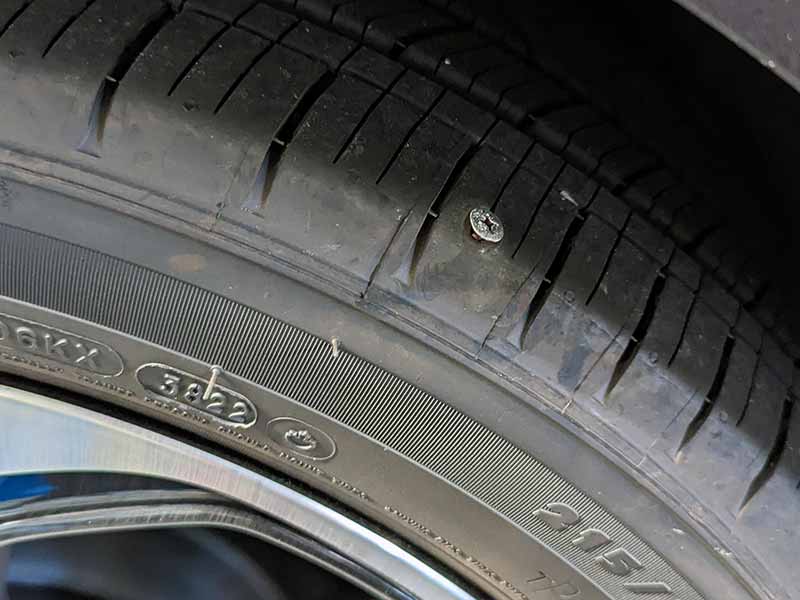
- Nail Punctures: Perhaps the most common form of tire damage is a puncture caused by a nail or screw. This typically occurs when the sharp end of the object pierces the tread, the thickest part of the tire. Depending on the angle and location, a nail puncture may cause a completely flat tire, a slow air leak or, in some cases, no noticeable leak at all. However, it’s essential to remember that this doesn’t equate to the absence of a problem.
- Hole Punctures: These often result from encounters with sharp rocks, glass shards, or other similar debris on the road. A hole puncture usually leads to a faster air leak compared to a nail puncture. This is because the offending object often dislodges from the tire after the initial impact, leaving an open path for the air to escape.
When The Nail Might Not Cause A Flat Tire
At first, it might seem counterintuitive that a tire doesn’t instantly deflate when punctured by a nail. This phenomenon primarily occurs when the nail enters the tire tread at a direct angle, acting as a makeshift plug for the hole it created. In this scenario, the tire may remain inflated, and you could technically continue driving. However, it’s important to clarify that this isn’t a permanent or safe solution.
How Long Can You Drive With A Nail In Your Tire?
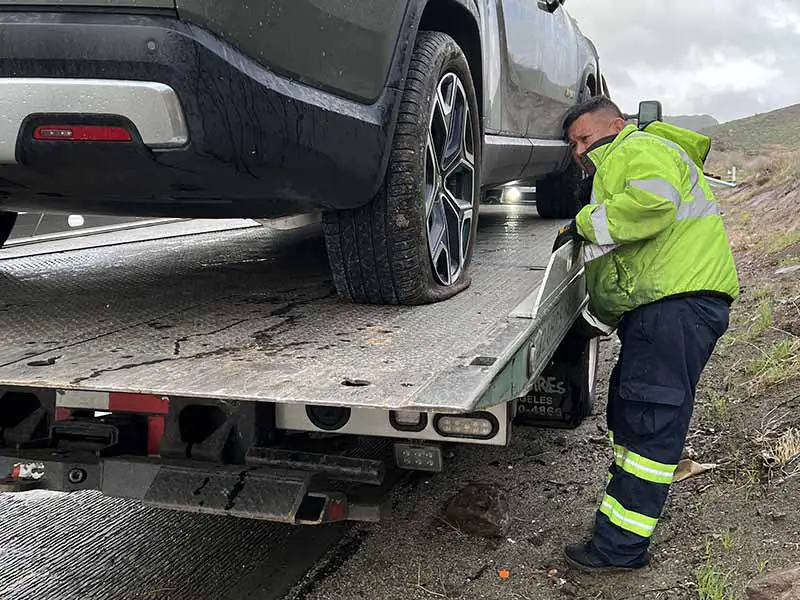
The timeframe within which you can drive with a nail in your tire varies greatly. Several factors come into play here, including the nail’s size, its angle of entry, and the puncture’s location on the tire. Under some circumstances, you might be able to continue driving for an extended period without experiencing a flat tire. However, this scenario should not be taken lightly. The presence of a nail weakens the tire’s structure and can lead to a blowout under the wrong conditions. As such, addressing the issue promptly should be a priority.
To Remove Or Not: The Nail Dilemma
When faced with a tire punctured by a nail, the immediate reaction might be to pull it out. However, this decision depends on a variety of factors. Let’s navigate through the specifics of this common dilemma.
When To Leave The Nail In The Tire
As mentioned earlier, a nail lodged directly into the tire can often act as a plug, preventing the tire from deflating rapidly. If you’re in a situation where professional help isn’t readily available, such as a deserted highway, it might be best to leave the nail in place temporarily.
When To Remove The Nail From The Tire
While it may be tempting to remove the nail yourself, this is generally not recommended. Removal can create a more significant pathway for air to escape, leading to a flat tire. Instead, the tire should be inspected and repaired by a professional.
Additionally, if the nail is in the sidewall or near the shoulder of the tire (the part where the tread meets the sidewall), it’s critical to seek immediate professional help. These areas are structurally less capable of sustaining damage and pose a higher risk if not addressed promptly.
Do I Need A New Tire If I Have A Nail In It?
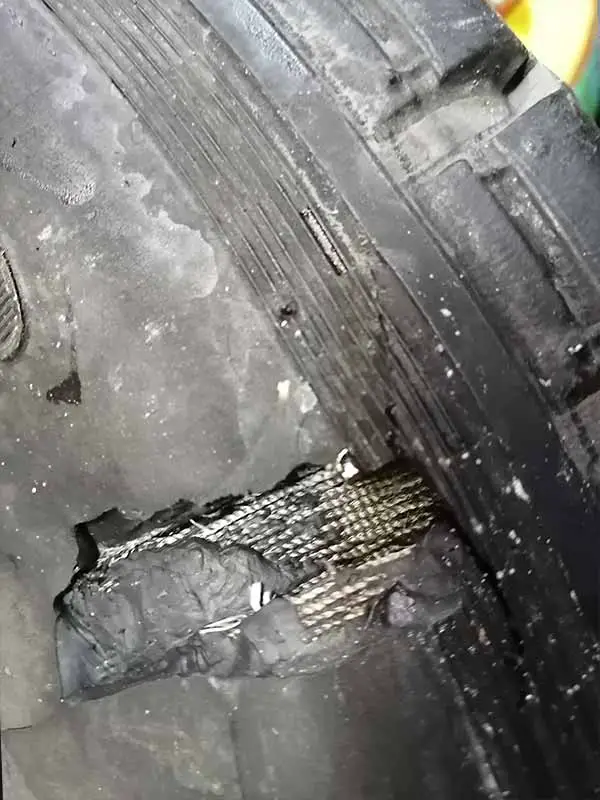
A nail in your tire doesn’t necessarily mean you’ll need to replace the whole tire. If the puncture is within the tread area and less than 1/4 inch in diameter, a professional repair job can often save the tire. However, if the puncture is larger, or if it’s in the sidewall or shoulder of the tire, replacement is typically the safer choice.
The Role Of Fix-A-Flat
You’ve probably heard of Fix-A-Flat, or perhaps you’ve got a can stashed away in your trunk as an alternative to a spare tire. Either way, let’s take a closer look at this often life-saving product and its role in the realm of tire punctures.
How A Tire Sealant Works On A Tire With A Nail
Fix-A-Flat is an aerosol tire inflator that seals small punctures and inflates the tire to its correct pressure. When applied, it fills the tire with a liquid sealant that coats the inside of the tire. This sealant then hardens upon encountering the air leaking from the puncture, effectively plugging the hole.
In the case of a nail puncture, the sealant works its way around the nail and into the hole it has created. When the nail is removed (preferably by a professional), the sealant remains in the hole, keeping the air inside the tire.
Can You Use Fix-A-Flat On A Tire With A Hole
Fix-A-Flat is designed to address minor punctures in the tread area of the tire. This includes both nail punctures and small holes. However, keep in mind that the effectiveness of tire sealants decreases as the size of the hole increases. For punctures larger than 1/4 inch in diameter, or for any puncture in the sidewall or shoulder of the tire, a tire sealant is unlikely to provide a reliable or safe repair.

When Is Fix-A-Flat A Good Choice?
While Fix-A-Flat can serve as a lifeboat in a sea of punctures, it’s important to know when to set sail with it. In some cases, using tire sealants is a smart move, while in others, it’s best to seek other solutions.
Ideal Situations For Tire Sealants
Fix-A-Flat shines in scenarios where a minor puncture has occurred in the tread area of your tire and professional help is not immediately available. For example, imagine you’re on a road trip and a tire goes flat due to a small nail or sharp stone. You’re miles from the nearest town, let alone a tire repair shop. A tire sealant can serve as your temporary patch, re-inflating the tire and sealing the small hole enough to allow you to drive to a repair facility safely.
Benefits Of Using Fix-A-Flat
- Convenience: The main benefit of Fix-A-Flat is its convenience. It’s a quick, easy-to-use solution that can get you back on the road in minutes, rather than waiting for roadside assistance or trying to change the tire yourself.
- Emergency Use: It’s an excellent tool for emergencies, allowing you to temporarily fix a punctured tire in remote areas or unsafe conditions.
- Prevents Further Damage: By re-inflating your tire, tire sealants can help prevent further damage that can occur if you continue to drive on a flat tire.
Step-By-Step: How To Use Fix-A-Flat
When the time comes to use Fix-A-Flat, it’s essential to know how to use it correctly. Improper usage can lead to ineffective sealing, or worse, further damage to your tire. Follow this step-by-step guide for a proper application.
Using Fix-A-Flat: A Simple Guide
- Ensure Safety First: Before anything else, ensure you’re parked safely off the road, away from traffic, with your hazard lights on.
- Locate The Puncture: Find the source of the leak. It’s usually a nail or a visible hole in the tread.
- Shake The Can: Vigorously shake the Fix-A-Flat can before using.
- Attach The Hose: Screw the hose on the top of the can onto the tire’s valve stem. The valve stem is the tiny protruding piece where air is pumped into the tire.
- Fill The Tire: Hold the can upright and press the button to release the sealant into the tire.
- Drive Slowly: Once the tire is inflated, drive slowly (under 20 mph) for a few miles to allow the sealant to spread evenly within the tire.
- Check Tire Pressure: If possible, stop and check your tire pressure after driving a short distance. If the tire is still not adequately inflated, you may use a bit more Fix-A-Flat, but do not exceed the recommended amount.
Recognizing The Limitations Of Fix-A-Flat
As with any product, tire sealants have limitations. Understanding these can help set appropriate expectations and avoid relying on it in situations where it may not be effective.
What Fix-A-Flat Can’t Fix
- Large Punctures and Cuts: Fix-A-Flat is designed to seal minor punctures, typically those under 1/4 inch in diameter. Larger punctures, significant cuts, or gashes are beyond the repair capacity of this product.
- Sidewall and Shoulder Damage: If the puncture is in the sidewall or shoulder of the tire, Fix-A-Flat is unlikely to be effective. These areas of the tire flex more during driving, making it harder for the sealant to maintain a seal.
- Bead Leaks and Valve Stem Leaks: Fix-A-Flat is not designed to repair leaks around the bead (where the tire meets the rim) or the valve stem.
Other Considerations
- Temporary Solution: Fix-A-Flat should only be considered a temporary fix to get you to a professional repair facility. It’s not a permanent solution, and driving on a tire sealed with Fix-A-Flat for an extended period can be risky.
- Balance Issues: The liquid sealant inside the tire can sometimes cause balance issues, leading to an uneven or uncomfortable ride.
- Professional Repair: Remember to inform the tire technician that you used Fix-A-Flat. The sealant needs to be cleaned out of the tire before a permanent repair can be made.
Resources
Below are some links you may find helpful when learning about tires
Final Thoughts
The key takeaway from our journey together in this article is that a nail in your tire is not the end of the world, nor does it necessarily signal the end for your tire. Armed with a can of Fix-A-Flat and the knowledge of when and how to use it, you can turn a potential catastrophe into a manageable bump in the road.
As we wrap up this informative ride, let’s reflect on a fitting quotation from Henry Ford, the pioneer of the automobile industry: “The only real mistake is the one from which we learn nothing.” Each nail in the tire is a lesson in handling unexpected hiccups in our journey—on the road and in life.
Good luck and happy motoring.