Ever looked at your tires and thought, “Hmm, are you feeling a bit deflated today?” It might sound silly, but your car’s tires speak volumes about its health—and your safety. Mastering the art of tire inflation can not only save you money but also ensure a smooth, safe ride every time.
How To Put Air In A Tire
To put air in a tire, you first need to know the recommended tire pressure for your vehicle. Then, using a tire pressure gauge and an air pump (at a gas station or home air compressor), you can inflate your tires to the right pressure.
In this article, we’ll walk you through the ins and outs of tire inflation, from understanding tire pressure and prepping your gear, to step-by-step guides for inflating your tires at a gas station or with a home air compressor. We’ll also cover what to do with a completely flat tire, how to know when to stop inflating, and an estimate of how long it takes to inflate a tire.
Let’s take a closer look.
Understanding Tire Pressure
In more technical terms, tire pressure is the amount of air in your tire, measured in pounds per square inch, or PSI for short. But we don’t need to get all geeky about it. It’s enough to know that the right amount of air makes your tire feel just as Goldilocks likes her porridge – not too hard, not too soft, but just right!
So, why is it a big deal?
- Safety First: If your tires are under-inflated (too soft), it can make your vehicle harder to control. Imagine trying to dribble a half-inflated basketball—it doesn’t go straight, does it? Over-inflated tires (too hard) aren’t good either—they’re more likely to get punctured or burst. Nobody wants that!
- Save Some Green: Maintaining the right tire pressure is like hitting a sweet spot—it makes your car more fuel-efficient. That means fewer pit stops at the gas station and more cash in your pocket.
- Long Live the Tires: Tires aren’t cheap, and we want them to last as long as possible. Properly inflated tires wear evenly, meaning they’ll live a long, happy life.
Alright, you’re on board. Now, how do you find the magical number—the recommended tire pressure for your vehicle? Don’t worry, no need to play guessing games. You can usually find this information in two places:
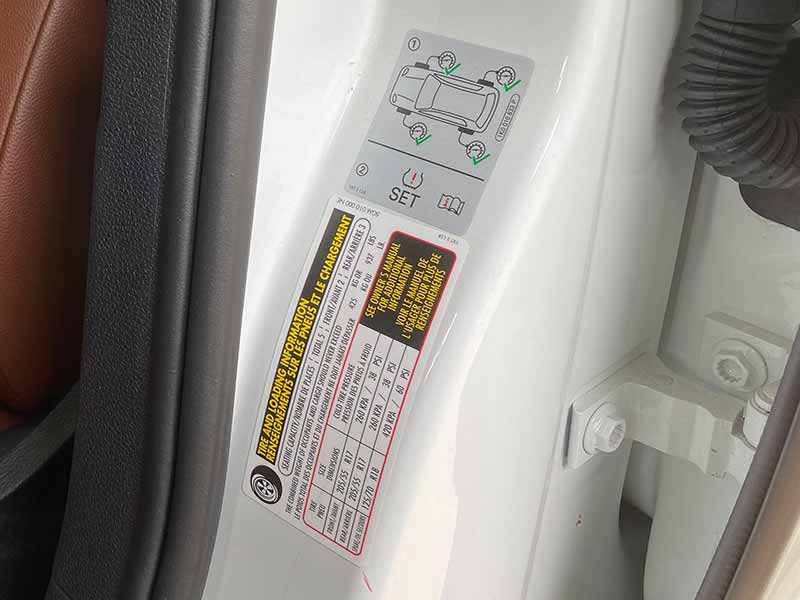
- Driver’s Side Door Jamb: Open the driver’s door, and look for a sticker on the door’s edge or the door jamb. This sticker should have a bunch of useful info, including your vehicle’s recommended tire pressure.
- Owner’s Manual: Like a treasure trove, your vehicle’s owner’s manual contains a wealth of information, including—you guessed it—tire pressure.
Remember, the recommended tire pressure can vary between different vehicles, so it’s always a good idea to check specifically for your ride.
Tools Needed to Inflate a Tire
Here’s what you’ll need:
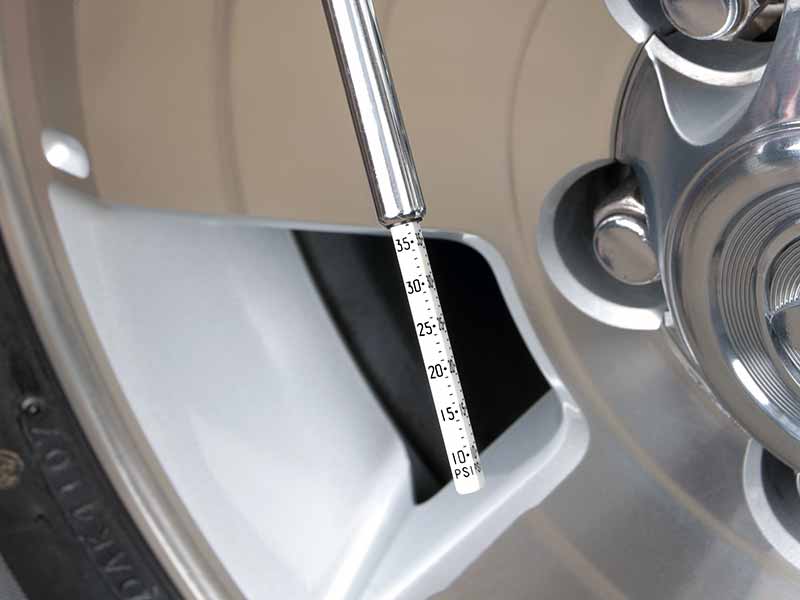
- Tire Pressure Gauge: This handy little tool is like the thermometer for your tires. It tells you how much air pressure is inside. There are different types, but the most common ones are the stick type (looks like a mini rocket), dial type (has a circular dial like a clock), and digital (it’s got a little screen that shows the pressure). Pick whichever you find the most user-friendly!
- Air Source: This is where the air to inflate your tire comes from. There are a couple of main options here:
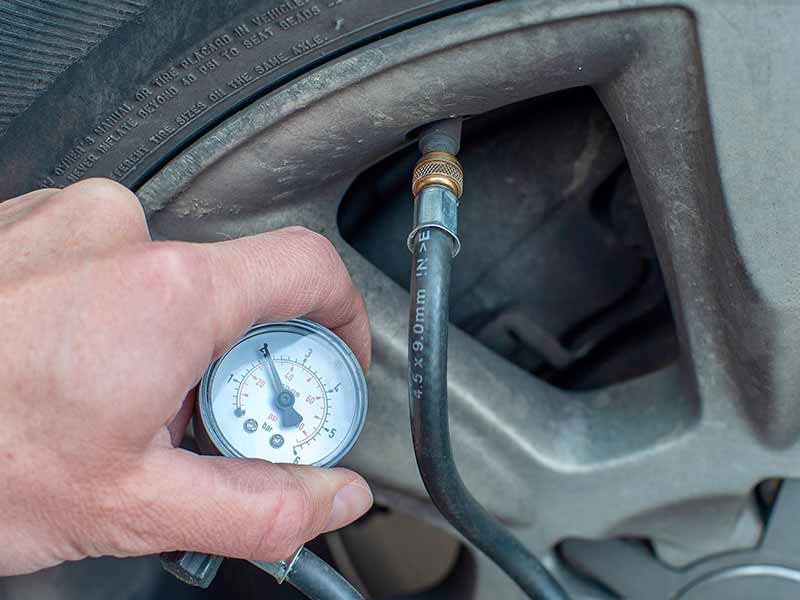
- Gas Station Air Pump: Found at most gas stations, these are public machines that you can use to fill your tires. Some charge a small fee, others are free. Just look for a machine that resembles a tall, skinny vacuum—it’s usually next to the vacuum cleaner itself!
- Home Air Compressor: If you’re a DIY enthusiast, you might have one of these at home. It’s a machine that compresses air (hence the name) and lets you use it to inflate tires, among other things.
- Valve Cap: This is the tiny cap that screws onto the valve stem of your tire. It’s not exactly a ‘tool’, but it’s an important part of the process, as it keeps dirt and debris from getting into your tire’s valve stem.
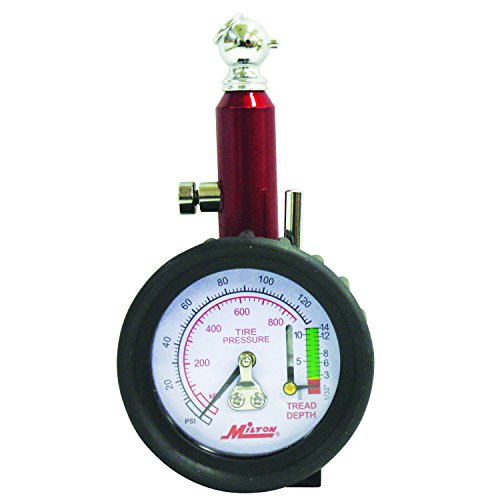
Dial Tire Pressure Gauge w/Integrated Tread Depth Gauge
How to Check Your Tire Pressure
Let’s break down using a tire gauge into simple, easy-to-follow steps:
- Find the Right Time: First things first, when should you check your tire pressure? The best time is when your tires are ‘cold’, meaning they haven’t been driven on for at least three hours. This is because driving heats up your tires, and heat can increase tire pressure.
- Grab Your Gauge: Get that tire pressure gauge we talked about earlier. Whether it’s digital, dial, or stick type, the idea is the same.
- Locate the Valve Stem: Look at your tire, and find the valve stem. It’s a small tube sticking out from your tire, usually covered by a small cap. Remove the cap and keep it safe—we’ll need it again.
- Check the Pressure: Now, insert the pressure gauge into the valve stem. If you’re using a stick type, make sure it’s inserted straight and watch as the stick pops out to show a reading. For a dial type, the needle will move around the dial to give a reading. And if you’re using a digital gauge, it’s even easier—just look at the number that pops up on the screen.
- Compare With Recommended Pressure: Once you have the reading, compare it with the recommended tire pressure for your vehicle (remember, you can find this on the sticker in your driver’s side door jamb or in your owner’s manual).
- If the pressure is too high (over-inflated), you’ll need to let some air out.
- If the pressure is too low (under-inflated), you’ll need to add some air.
- If it’s just right, give yourself a high five—you’re all set!
- Replace the Valve Cap: Don’t forget to screw the valve cap back onto the valve stem. This keeps out any dirt or debris.
Inflating Tires at a Gas Station
Now we’re going to show you how to inflate your tires at a gas station. Let’s break it down:
- Find an Air Pump: Start by locating the air pump at the gas station. It’s usually near the vacuum cleaners, and looks like a skinny, tall box. Some stations provide this service for free, while others might charge a small fee. If it’s a paid machine, make sure to have some coins handy.
- Prepare Your Tires: Before you start, remove the valve caps from your tires and keep them in a safe place. You don’t want to lose them!
- Read the Instructions: The air pump should have instructions on it. Give them a quick read to familiarize yourself with the machine.
- Set the Desired Pressure: Some advanced machines will allow you to set the desired tire pressure (PSI) and will stop filling once this pressure is reached. If this option is available, set the machine to the recommended tire pressure for your vehicle.
- Start Filling: Now, take the air hose and press it onto the valve stem of your tire. If your air pump has a trigger, hold it down to start filling. If not, the air might start flowing as soon as you press the hose onto the stem.
- Check Pressure Periodically: If the air pump doesn’t automatically stop at the right pressure, you’ll need to check the tire pressure occasionally while filling. Just remove the air hose, check the pressure with your gauge, and repeat the process until you’ve reached the desired pressure.
- Repeat for All Tires: Once one tire is done, replace the valve cap and move on to the next tire. Repeat the process until all your tires are nicely inflated.
- Final Check: Once you’ve filled all your tires, use your tire pressure gauge for a final check to make sure all the tires are at the recommended pressure.
Inflating Tires with an Air Compressor
Let’s walk through using a portable air pump together:
- Ready Your Compressor: Start by setting up your air compressor. Make sure it’s connected to a power source and has sufficient air supply. Different models might have slightly different setups, so it’s a good idea to refer to the owner’s manual if needed.
- Prepare Your Tires: Just like at the gas station, begin by removing the valve caps from the tires that need air.
- Attach the Air Hose: Next, take the air hose from your compressor and attach it to the tire’s valve stem. Most air hoses have a fitting that will lock onto the valve stem when you press it down.
- Start Inflating: Turn on your air compressor (usually by flipping a switch) and let the air start flowing into the tire.
- Monitor the Pressure: Just like at the gas station, keep an eye on the pressure. Since your home compressor probably doesn’t have a built-in gauge, you’ll need to stop inflating occasionally and check the tire pressure with your trusty tire pressure gauge.
- Fine-Tune the Pressure: If you’ve put in too much air, press on the tire valve to let some out, then check the pressure again. If you need more air, just keep the compressor running a bit longer.
- Cap It Off: Once each tire is at the perfect pressure, don’t forget to replace the valve cap. It’s a small but mighty part that keeps dirt and gunk out of your tires.
- Repeat for All Tires: Repeat the process with each tire until they’re all feeling pumped up and ready to roll.
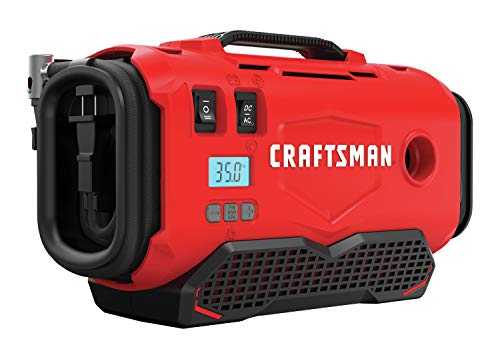
I Recommend Every Keep A Portable Air Compressor In Their Car Or Truck
Inflating a Flat Tire at Home
Here’s how you can inflate a completely flat tire at home:
- Inspect the Tire: Before anything else, give your flat tire a quick inspection. If it’s been punctured by a nail or another sharp object, inflating it might not be safe or effective. In that case, you’ll need to repair or replace the tire.
- Prepare the Compressor: Set up your air compressor just like we did in the previous section.
- Remove the Valve Cap: Find the valve stem on the flat tire and remove the cap. Remember, keep it safe—you’ll need it later.
- Attach the Air Hose: Next, attach the air hose from the compressor onto the valve stem. Make sure it’s securely in place.
- Start Inflating: Now it’s time to start the compressor and begin inflating the tire. Because the tire is completely flat, this could take a few minutes. Just be patient.
- Monitor the Pressure: Keep a close eye on the pressure gauge. If you don’t have a gauge on your compressor, you’ll need to stop occasionally and use your hand-held tire pressure gauge to check the pressure.
- Stop at the Right Pressure: Once you’ve inflated the tire to its recommended pressure, turn off the compressor. Remember not to over-inflate!
- Replace the Valve Cap: Put the valve cap back on the valve stem, nice and tight. This keeps out dust and debris.
- Check the Tire: After inflating a completely flat tire, it’s especially important to check it for leaks. You can do this by spraying some soapy water on the tire and looking for bubbles that form—a sign of escaping air.
Knowing When to Stop Inflating a Tire
How do you know when to stop putting air into a tire? This is important, because over-inflating can be just as harmful as under-inflating.
- Check Your Recommended Tire Pressure: This is your main guide. You can usually find this number on a sticker inside your driver’s side door jamb, or in your vehicle’s owner manual. The number is expressed in PSI (pounds per square inch).
- Use a Tire Pressure Gauge: Your trusty tire pressure gauge isn’t just for checking tire pressure—it’s also your go-to tool for knowing when to stop inflating. When adding air, pause every so often to check the current tire pressure. Once you hit your target PSI, stop inflating!
- Don’t Rely on Looks Alone: A common mistake is thinking you can tell when a tire is properly inflated just by looking at it. Even when a tire looks fine, it could be under-inflated. And an over-inflated tire can still look normal, too. So always use a tire pressure gauge.
- Remember the Goldilocks Principle: Not too high, not too low, but just right! Over-inflated tires can be hard and bouncy, leading to a rough ride and increased risk of damage from potholes or other road hazards. Under-inflated tires can cause poor handling and fuel efficiency, and they can wear out more quickly. Aim for the recommended PSI to keep your tires (and your ride) smooth and safe.
Time Needed to Inflate a Tire
Inflating a tire isn’t as time-consuming as you might think. But, as you’ve probably guessed, the exact time can depend on a few factors. Let’s break it down:
- Starting Pressure: Naturally, a completely flat tire will take longer to inflate than a tire that’s just a little low on air. A completely flat tire might take several minutes to inflate, while a tire that’s just a little under-inflated might be pumped up in a minute or two.
- Your Equipment: The power of your air compressor can also affect how long it takes to inflate a tire. A powerful, high-capacity compressor can inflate a tire more quickly than a smaller, less powerful one.
- Tire Size: Larger tires require more air volume, so they can take longer to inflate than smaller tires. For example, a large truck tire could take longer to inflate than a passenger car tire.
- The Desired Pressure: If you’re aiming for a higher tire pressure (such as for a heavy load), it will naturally take longer to reach that pressure than if you’re inflating to a lower pressure.
So, while we can’t give you an exact number, generally speaking, it can take anywhere from a few seconds to a few minutes to inflate a tire, depending on these factors. It’s not a huge time commitment, but it’s time well spent to ensure a safe and comfortable ride.
Resources
Below are some links you may find helpful when learning about tires
- How to put air in your tires – Les Schwab
- How to check tire pressure with a tire pressure gauge – Bridgestone
Final Thoughts
By now, you know that maintaining the right tire pressure is key to ensuring a smooth ride, fuel efficiency, and longevity of your tires. Remember, your vehicle’s tire pressure isn’t just a number—it’s a critical aspect of your car’s overall health and your safety on the road.
Key takeaways from our journey include:
- Always keep a tire pressure gauge handy. It’s an essential tool for checking your tire pressure and ensuring you don’t over or under-inflate your tires.
- Inflating tires isn’t a daunting task. Whether you’re at a gas station or at home with an air compressor, you can easily fill up your tires to the recommended PSI.
- Even a completely flat tire isn’t the end of the world. With a bit of patience and the right tools, you can bring it back to life and back on the road.
- Knowing when to stop inflating is crucial. Always aim for the recommended PSI—remember, we’re after the Goldilocks’ “just right” principle.
- Finally, inflating a tire isn’t a major time investment. Depending on a few factors, it can take anywhere from a few seconds to a few minutes per tire.
Armed with this knowledge, you’re now more than prepared to keep your tires in top shape.
Good luck and happy motoring.