Ever felt that sinking feeling when you press the brakes, and your car doesn’t quite respond as it should? It might not be your brakes – it could be your tire pressure. It’s more crucial than most realize, and knowing how to check it can be a game-changer for your driving experience.
How To Check Tire Pressure
To check tire pressure, you can use a tire pressure gauge by placing it on the valve stem of your tire.
Alternatively, some vehicles display tire pressure directly on the dashboard, or you can use the air machines at gas stations.
In this article, we’ll dive deep into the world of tire pressures, exploring everything from understanding its importance to detailed step-by-step guides on checking it in various situations.
Let’s take a closer look.
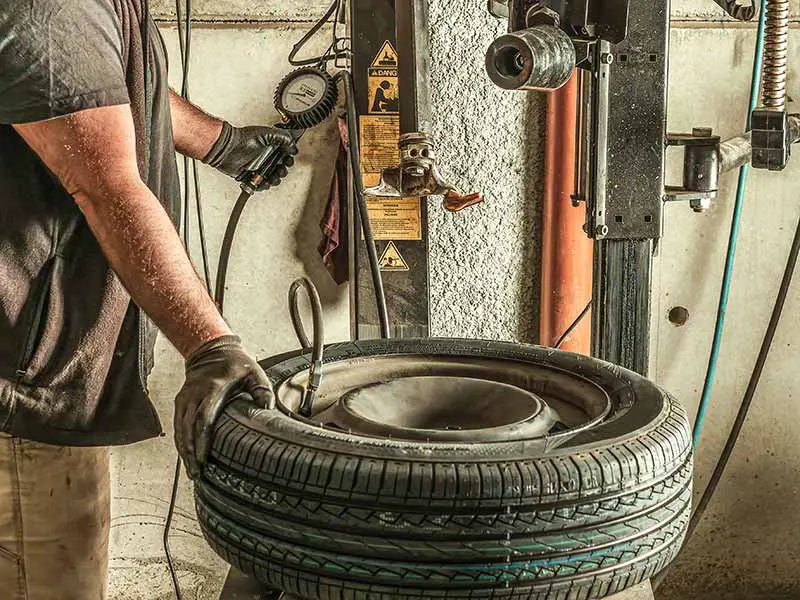
How to Check Tire Pressure Using a Gauge
So, you’ve decided to get to know your tires a bit better, huh? Awesome choice! A tire pressure gauge is your new best buddy for this journey. Let’s break down how to use it, step by step.
Picking a Tire Pressure Gauge
There are a few types of gauges out there. Here’s a quick lowdown:
- Stick-Type Gauges: These look like pens. They’re cheap and compact, but not always the most accurate.
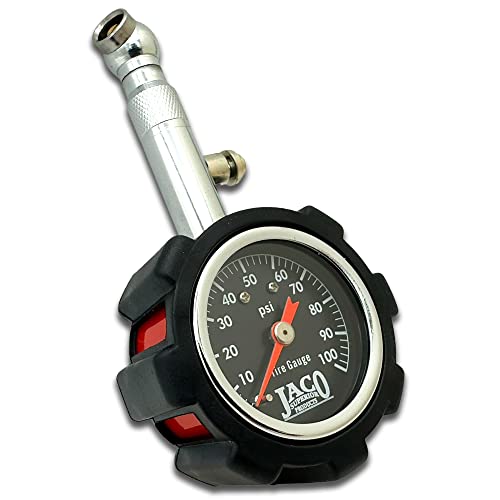
- Dial Gauges: Think of a tiny clock face with a needle. A bit bulkier but generally more accurate.
- Digital Gauges: These bad boys give you a digital readout. They’re pretty accurate and easy to read, especially in the dark.
Pro Tip: No matter which one you pick, make sure you keep it clean and protected. Dirt can mess with its accuracy!
Tire Pressure Gauge With Release Valve
Measuring Your Tire’s PSI
Follow these easy-peasy steps, and you’ll be a tire-pressure-checking champ in no time!
- Wait for the Right Moment: Remember, cold tires give the best readings. So, it’s best to check in the morning before you start cruising around.
- Find and Unscrew the Valve Cap: It’s a tiny cap on your tire’s valve stem. Don’t lose it!
- Place Your Gauge on the Valve Stem: Press down hard enough so that no hissing sound of air escaping is heard.
- Read the PSI: If you’re using a stick-type, the stick will pop out and show a number. With a dial gauge, the needle will point to a number. And with digital? Well, just read the screen!
- Replace the Valve Cap: Don’t forget this step! It keeps dirt out and air in.
Decoding the Reading
Now that you’ve got a number, it’s time to see if it’s in the green zone.
- Check Your Owner’s Manual or Door Sticker: Here you’ll find the recommended tire pressure (or the recommended psi) for your vehicle.
- Compare Your Reading: If your tire’s psi matches the recommended psi, you’re golden! If it’s too high, you’ve got overinflated tires. Too low? Underinflated.
Pro Tip: It’s a good habit to check all four tires. Sometimes, front and rear tires might have different recommended pressures. And while you’re at it, check the spare too!
How to Check Tire Pressure on the Dashboard
Alright, gearheads and tech enthusiasts, let’s take a minute to appreciate the modern marvels of technology. Our cars these days are not just chunks of metal; they’re smart and keep an eye on things for us. One of these clever features? Monitoring tire pressure right from the dashboard! Let’s dive into how it works.
Tire Pressure Monitoring Systems (TPMS)
Many of today’s cars come equipped with a neat system called TPMS. It’s like having a guardian angel for your tires.
- What It Does: The TPMS monitors the air pressure in your tires. If something’s off, it’ll give you a heads-up right on your dashboard.
- Why It’s Awesome: It’s an early warning system! Before a tire problem becomes a tire disaster, you’ll know about it.
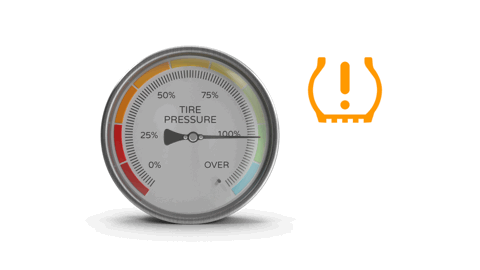
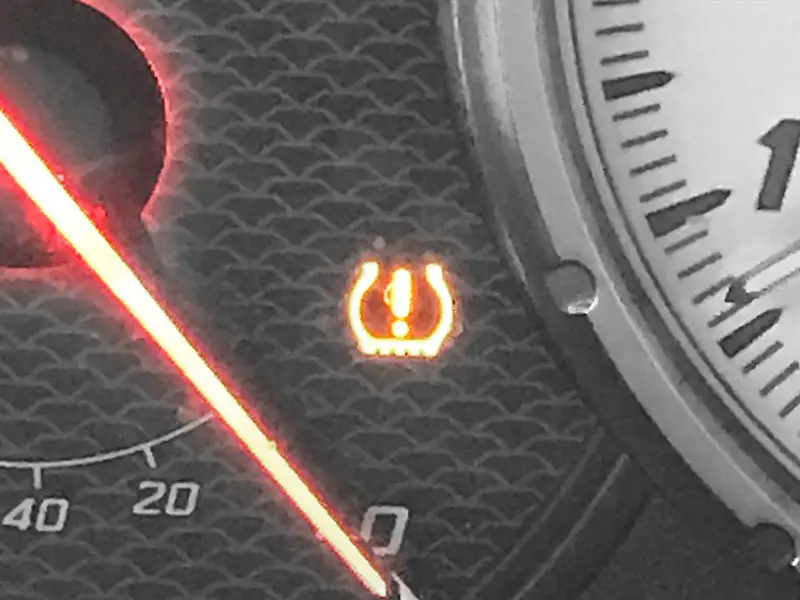
Dashboard Lights and Icons
Ever seen an icon that looks like an exclamation point inside something that looks… well, kinda like a flat tire? That’s your TPMS talking!
- Steady Light: This means one or more tires are either underinflated or overinflated. Time to check them out.
- Flashing Light: If it blinks at you for about a minute before staying steady, the TPMS itself might be having issues and needs a check-up.
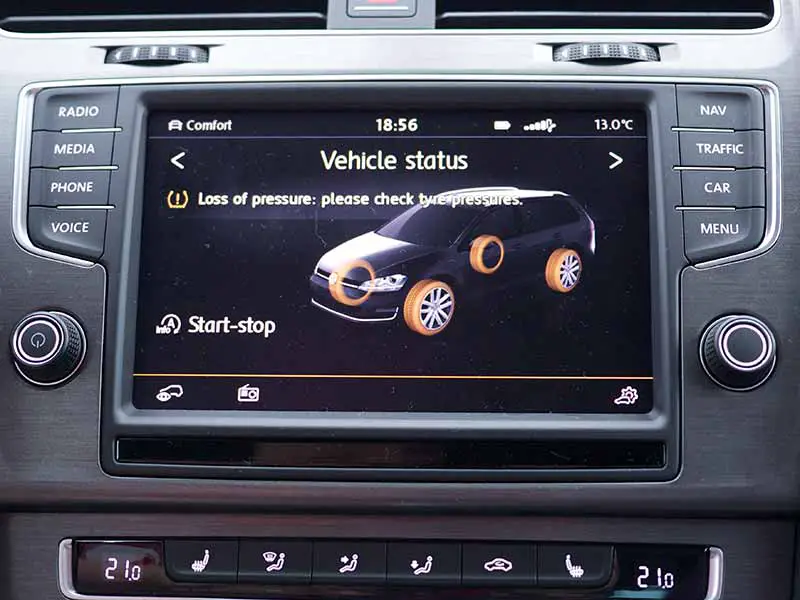
Steps to Check Tire Pressure via Dashboard
- Start Your Car: This gets everything up and running, including your TPMS.
- Look for TPMS on Your Dashboard: Most cars display it prominently, but if you can’t find it, your owner’s manual will show you the way.
- Decode the Reading: Some advanced systems can even show you the exact psi of each tire. If it’s lower or higher than your vehicle’s recommended tire pressure, time for some air adjustments!
Limitations of TPMS
As nifty as the TPMS is, it’s not perfect.
- Not Always Early: Most TPMS alerts don’t kick in until a tire is 25% underinflated. By then, fuel efficiency might already be affected.
- False Alarms: Sometimes, the system can send warnings even when the tire pressure is fine, especially in extreme cold or heat.
Tip: Always double-check with a manual gauge if your TPMS lights up, just to be sure.
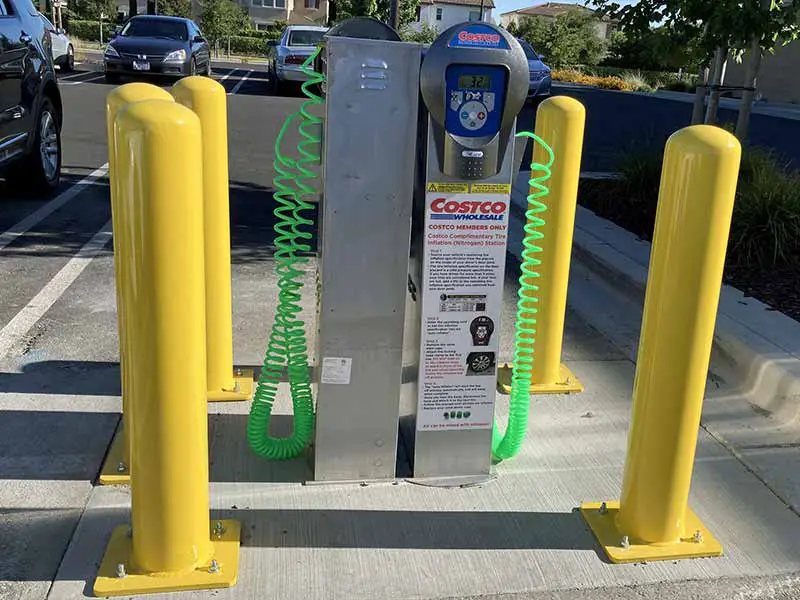
How to Check Tire Pressure at a Gas Station
Gas stations: where our vehicles go to quench their thirst. But did you know they’re also prime spots to check and adjust your tire pressure? And the best part? It’s often super easy and sometimes even free! Let’s get you prepped for your next gas station tire-checking adventure.
Why Gas Stations Rock for Tire Pressure Checks
- Accessibility: They’re everywhere! On long road trips or just around the corner.
- Equipment: Most have air compressors with built-in gauges. So, even if you left your trusty gauge at home, they’ve got you covered.
Step-by-Step Guide: Gas Station Tire Pressure 101
- Drive to the Air Station: Some gas stations charge a fee, but here’s a hack – paying for gas sometimes gets you free air. Check signs or ask an attendant!
- Find the Air Hose and Gauge: Usually, these are combined into one tool. Handy, right?
- Remove the Valve Cap: That tiny cap on your tire’s valve stem. Put it somewhere safe (pockets are great) so it doesn’t play hide-and-seek.
- Attach the Air Hose: Push the hose’s fitting onto the valve stem. If you hear air escaping, press down harder.
- Check the Pressure: Read the gauge, usually a digital screen or dial on the air machine.
- Add or Release Air: If your tire’s low, add air in short bursts. Too high? Gently press the center of the valve stem to release some air.
- Recheck and Adjust: Check the pressure again. It’s a bit like seasoning food; add a bit, taste, then adjust.
- Return the Valve Cap: Screw it back on tight!
What Should My Tire Pressure Be?
So, you’ve gotten the hang of how to check your tire pressure. High five! But the big question looming in the air (pun intended) is: What’s the magic number? What should my tire pressure actually be? Don’t worry; we’ve got you covered.
Every Car Is Unique: A Quick Overview
Cars, just like us humans, have their own unique characteristics. One size definitely doesn’t fit all.
- Manufacturer Recommendations: Each vehicle has a specific tire pressure recommended by the people who made it.
- Front vs. Rear Tires: Sometimes, front and rear tires require different pressures. Yes, it’s like shoes; each foot (or tire) might have its own needs!
Finding the Magic Number: Your Go-To Guide
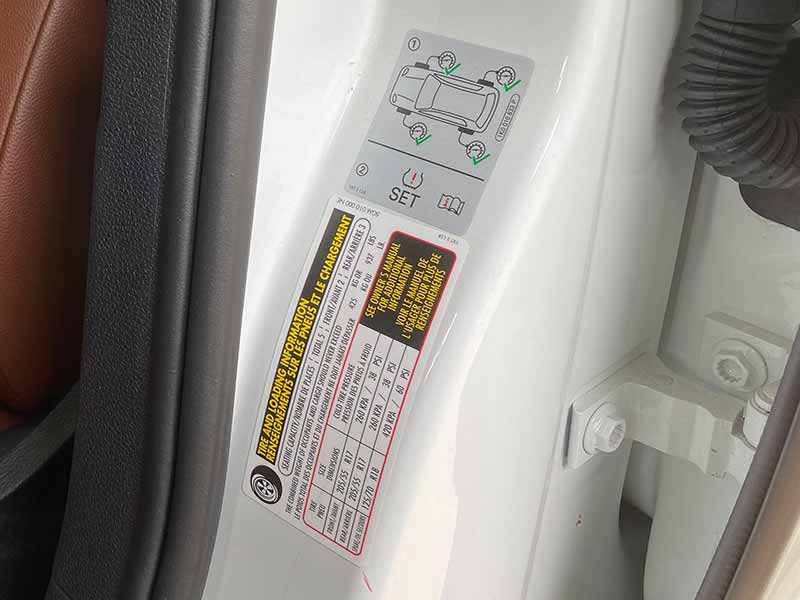
- Owner’s Manual: Think of this as your car’s biography. Dive into it, and you’ll usually find the recommended psi for your tires.
- Sticker Inside the Door: Many cars have a handy sticker on the driver’s side door jamb. It’s a cheat sheet with tire pressure info.
- Tire Sidewall: Caution here! The number on the tire’s sidewall is the MAXIMUM pressure the tire can handle, not the recommended. Use this as a “do not exceed” number, not your daily guide.
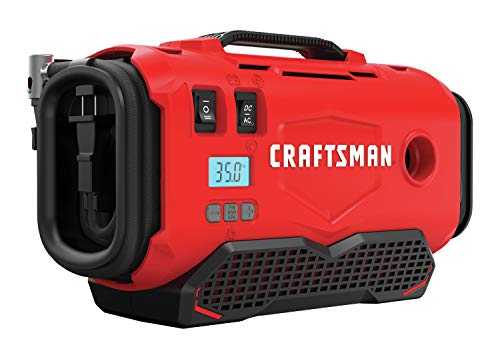
Craftsman V20 Inflator – Portable Air Compressor
Factors That Can Influence Ideal Tire Pressure
While there’s a recommended psi, certain factors might nudge that number up or down a bit.
- Weather: Cold shrinks, and heat expands! Tire pressure can change with temperature fluctuations.
- Load: Carrying a heavy load? It might require a bit more pressure in those tires.
- Driving Conditions: Zipping down highways vs. off-roading can have different tire pressure needs.
The Risks of Getting It Wrong
Having the wrong tire pressure isn’t just a minor whoopsie. It’s crucial to get it right.
- Underinflated Tires: These can overheat and, in worst-case scenarios, even burst! Plus, they wear out faster and can hurt fuel economy.
- Overinflated Tires: They make for a super bumpy ride and can be more prone to damage from potholes or debris.
Regular Checks: Make It a Habit!
It’s not a set-and-forget kind of deal. Tire pressure can change over time, so make checking it a regular part of your car care routine.
Pro Tip: Monthly checks are a great habit. And always check before long road trips!
Resources
Below are some links you may find helpful when learning about tires
Final Thoughts
Tire pressure might seem like a small detail, but it’s truly the heartbeat of a safe and efficient ride. Remember, proper tire inflation ensures longevity for your tires, optimum gas mileage, and most importantly, safety for everyone on board.
Regular checks, whether with your trusty gauge, via your dashboard, or during a gas station pit stop, are essential. Plus, there are plenty of spots to check for free!
As a final note, always refer back to your owner’s manual or the recommended PSI label on your vehicle to ensure you’re hitting that sweet spot of correct tire pressure.
Good luck and happy motoring.