Alignment is one of those maintenance items that’s invisible when it’s right and expensive when it’s wrong. A misaligned vehicle can chew through a set of tires in half their expected lifespan — that’s potentially $400-500 in lost tread life from a problem that costs $75-100 to fix.
The trouble is that misalignment develops gradually. You don’t wake up one morning with your car suddenly pulling hard to the right. It creeps in over months, and by the time you notice the symptoms, the uneven wear has already been happening for thousands of miles.
This guide covers what alignment actually means, how to spot the warning signs, what causes it to go out, and how to make smart decisions about when to get it checked.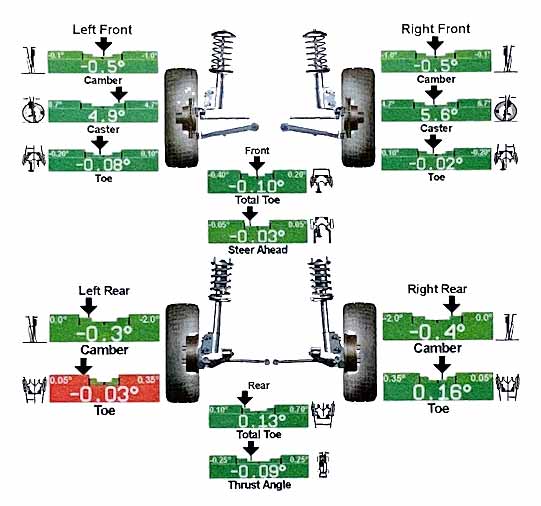
In This Guide
Dedicated articles covering specific topics in this guide:
- Toe In vs Toe Out: What’s the Difference? — Toe-in means your wheels point slightly toward each other; toe-out means they point slightly away.
- How Often Should You Get an Alignment? — Every 12–24 months for most drivers, or any time you notice pulling, uneven wear, or steering wheel off-center.
- Positive vs Negative Camber: What’s the Difference? — Positive camber leans the top of the wheel outward; negative leans it inward.
- Reasons You Can’t Get an Alignment — If a shop won’t or can’t align your car, it’s almost always one of five reasons: worn suspension parts, frozen adjusters, damaged steerin…
- Car Still Pulls After Alignment? Here’s Why — If your car still pulls after a fresh alignment, the cause is almost always something the alignment can’t fix: tire defects, brake drag,…
What Is Tire Alignment?
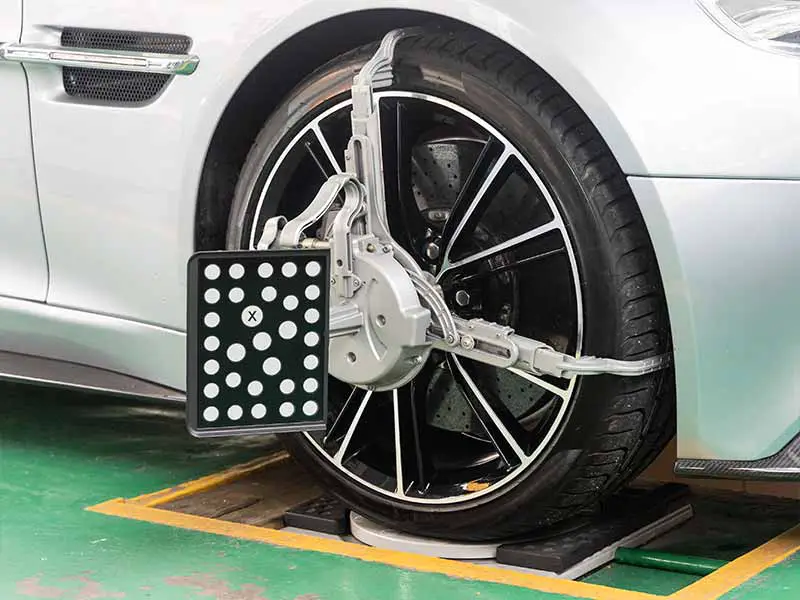
Tire alignment — technically “wheel alignment” — is the adjustment of your vehicle’s suspension angles to ensure the wheels point in the correct direction relative to each other and to the road surface. It’s not about adjusting the tires or wheels themselves. It’s about adjusting the suspension components that control how the wheels sit.
Three angles are measured and adjusted:
Toe
Toe is whether your tires point slightly inward (toe-in) or outward (toe-out) when viewed from above — like looking down at your feet. Imagine standing with your toes pointed slightly inward versus slightly outward. Your tires can do the same thing.
Toe-in means the front edges of the tires are closer together than the rear edges. A small amount of toe-in is common and intentional on most vehicles — it helps with straight-line stability.

Toe-out means the front edges are farther apart than the rear edges. Toe-out makes the vehicle feel twitchy and unstable at speed.
Toe is the alignment angle that goes out of spec most often and has the most dramatic effect on tire wear. A toe misalignment scrubs the tread sideways with every mile driven, creating a distinctive feathered wear pattern that you can feel by running your hand across the tread — smooth one direction, rough the other.
Camber
Camber is the inward or outward tilt of the tire when viewed from the front of the vehicle.
Negative camber means the top of the tire tilts inward toward the vehicle. A small amount of negative camber is normal and improves cornering grip. Too much negative camber causes excessive wear on the inner edge of the tread.
Positive camber means the top of the tire tilts outward. This is less common on modern vehicles but causes wear on the outer edge of the tread.


Camber misalignment typically happens from worn suspension components (ball joints, control arm bushings, struts) or from impact damage (hitting a pothole or curb hard enough to bend something).
Caster
Caster is the angle of the steering pivot point when viewed from the side of the vehicle. It affects straight-line stability and steering return — how the steering wheel returns to center after a turn.
Caster doesn’t directly cause tire wear, but incorrect caster can make the vehicle pull to one side and can affect how camber changes during steering. Most drivers won’t need to think about caster specifically — it’s adjusted as part of a full alignment.


Signs You Need an Alignment
Your vehicle pulls to one side. On a flat, straight road with your hands light on the wheel, the car should track straight. A consistent drift to one direction indicates an alignment issue. Note: a slight pull can also be caused by road crown (most roads are slightly angled for drainage), uneven tire pressure, or a brake issue. Rule those out before assuming alignment.
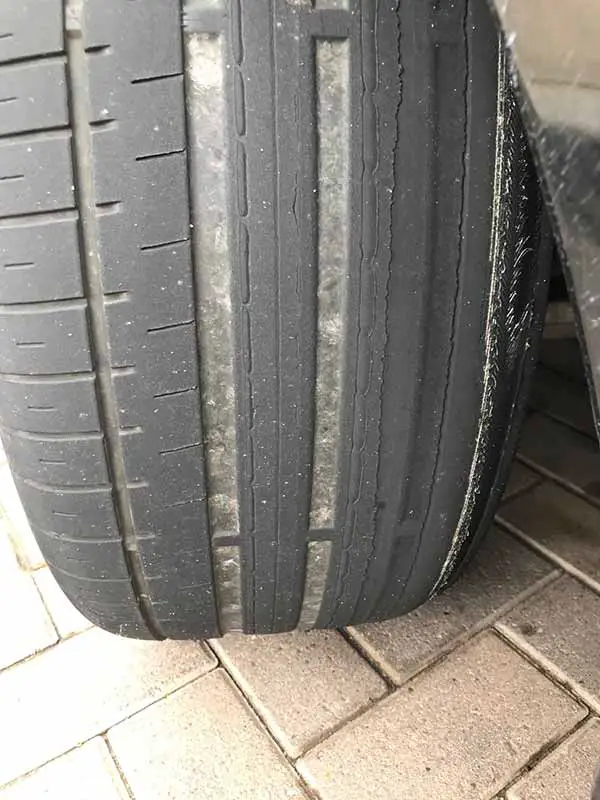
Uneven tire wear. This is the most reliable indicator and the most expensive consequence. Check your tires for one-sided wear (inner or outer edge significantly more worn than the other side) and feathering (tread ribs feel smooth one direction, rough the other — run your hand across the tread to check).
Steering wheel is off-center. When driving straight on a flat road, the steering wheel should be centered. If it’s rotated 5-10 degrees to one side when driving straight, your toe or caster is likely off.
Steering feels loose or wanders. If the vehicle doesn’t hold a straight line and you’re constantly making small corrections, alignment (particularly toe) may be the cause.
After hitting something. A significant pothole, curb strike, or road debris impact can knock alignment out of spec immediately. If you feel a change in how the vehicle tracks after an impact, get the alignment checked promptly — driving thousands of miles on a fresh misalignment will destroy your tires.
Two-Wheel vs. Four-Wheel Alignment
Two-wheel (front-end) alignment adjusts only the front wheels. This is adequate for some older vehicles with solid rear axles that don’t have adjustable rear suspension. It’s faster and cheaper.
Four-wheel alignment adjusts all four wheels and measures the relationship between front and rear axles. This is what most modern vehicles need, especially anything with independent rear suspension (which is most cars, crossovers, and SUVs made in the last 20 years).
Always get a four-wheel alignment unless your vehicle physically doesn’t allow rear adjustment. Even on vehicles where the rear can’t be adjusted, a four-wheel measurement tells the technician whether the front alignment is correct relative to the rear — a two-wheel alignment can have the front wheels perfectly aligned to the road but pointing in a different direction than the rear, which causes the vehicle to crab-walk slightly.
Can a 2WD car get a four-wheel alignment? Yes — and it should. Two-wheel drive vs. four-wheel drive refers to which axle provides power. Four-wheel alignment refers to which wheels are measured and adjusted. Every car with independent rear suspension benefits from a four-wheel alignment regardless of which wheels are driven.
What Causes Misalignment
Normal wear and tear. Suspension components — ball joints, tie rod ends, control arm bushings, strut mounts — wear gradually over time. As they develop play, alignment angles shift. This is the most common cause and why periodic alignment checks are important.
Impact damage. Hitting a pothole, curb, or debris hard enough to jar the suspension can knock alignment out immediately. This is the most sudden cause and often the most noticeable.

Worn suspension components. Worn ball joints, tie rod ends, and bushings allow the wheel to shift from its intended position. If your alignment goes out of spec repeatedly after being corrected, worn components are almost certainly the cause — the alignment can’t hold because the parts that maintain it are worn out. Fixing alignment without replacing worn components is wasting money.
Modifications. Lifting or lowering a vehicle, installing different wheel sizes, or modifying suspension components all change the geometry and typically require a realignment.
How Often Should You Get an Alignment?
There’s no universal mileage interval like there is for oil changes or tire rotation. But here’s a practical framework:
Check alignment annually or every 12,000-15,000 miles as a preventive measure. A quick alignment check catches problems before they’ve caused significant tire wear.
Check alignment whenever you buy new tires. Mounting new tires on a misaligned vehicle starts destroying them from day one. Many tire shops offer a discounted alignment with a tire purchase — take it.
Check alignment after any significant impact. Pothole, curb, road debris — if you felt a hard jolt, get it checked.
Check alignment if you see uneven wear. Uneven wear is the symptom. Alignment (or worn components) is usually the cause. Fix the cause before the symptom eats through another set of tires.
Check alignment if the vehicle pulls or the steering wheel is off-center. These are alignment symptoms that will worsen over time.

What an Alignment Costs
A standard four-wheel alignment typically costs $75-120 at most shops. Some shops offer alignment packages or lifetime alignment plans for $150-200 that cover unlimited alignments for a set period or the life of your tires.
Whether a lifetime alignment plan is worth it depends on how long you keep vehicles and how often you encounter alignment-disrupting conditions. If you drive on poorly maintained roads with frequent potholes, a lifetime plan can pay for itself in 2-3 visits. On smooth suburban highways, an annual check may be sufficient.
Discount Tire, Firestone, Pep Boys, and most independent shops offer alignment services. Prices vary by market — call around for quotes. The important thing is that you do it, not where you do it.
The Alignment and Tire Rotation Connection

Alignment and rotation work together to protect your tires. Rotation distributes wear evenly across all four tires. Alignment ensures each tire wears evenly across its own tread surface. Neglecting either one accelerates wear, but neglecting alignment is more expensive because the damage is concentrated — a misaligned wheel can destroy one edge of a tire in 10,000 miles while the rest of the tread is fine.
The best practice: rotate every 5,000-7,500 miles, check alignment annually, and always check alignment when installing new tires.
Frequently Asked Questions
Q: Can I align my own tires?
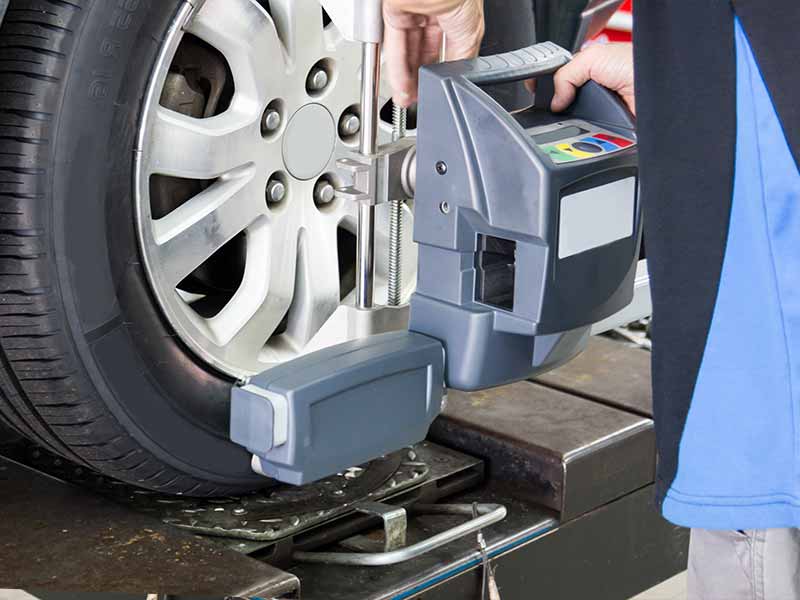
A: A proper alignment requires specialized equipment — a four-wheel alignment machine with sensors that measure all three angles simultaneously. This isn’t a DIY job. Some enthusiasts do rough toe adjustments at home using string lines, but this doesn’t replace a professional alignment.
Q: Does tire rotation affect alignment?
A: No. Rotation changes which tire is at which position — it doesn’t change the suspension angles. However, if you notice uneven wear after a rotation, it may reveal an alignment problem that was previously masked because the wear was developing gradually on tires that stayed in one position.
Q: How long does an alignment take?
A: Usually 30-60 minutes for a standard four-wheel alignment. If suspension components need adjustment or replacement, it can take longer.
Q: My alignment keeps going out. Why?
A: If alignment shifts repeatedly after being corrected, worn suspension components are almost certainly the cause. Ball joints, tie rod ends, and control arm bushings develop play as they wear, preventing the alignment from holding. A good alignment shop will identify worn components during the alignment and recommend replacement.
Q: Is alignment the same as balancing?
A: No. Alignment adjusts the angles at which your wheels meet the road. Balancing corrects weight distribution around each individual wheel/tire assembly. Both affect ride quality and tire wear, but they address completely different problems. A vibration at highway speed is usually a balance issue. A pull to one side or uneven edge wear is usually an alignment issue.
Uneven tire wear might also indicate tire quality issues. Check our tire reviews for treadwear scores and real-world owner feedback on how each tire wears over time.
Help A Friend (& Us!) By Sharing This Article