Ever find yourself in a situation where you needed to remove a tire from a rim but didn’t have a machine to do the job? Fear not, because that predicament can be an opportunity to learn a new skill.
How To Take Tires Off Rims
Removing a tire from a rim without a machine requires some essential tools, patience, and the correct technique. With a bead breaker or a pry bar, you can carefully break the tire bead and then pry the tire off the rim.
In this article, we’ll guide you through the entire process, covering the essential tools you’ll need, the step-by-step method of removing a tire from a rim, the usage of a manual tire changer, how to avoid damage to your tire and rim, and even how to break a tire bead by hand.
Let’s take a closer look.
Essential Tools For Manual Tire Removal
Let’s talk about the tools that you’ll need to perform your own “tire surgery” at home. Now, just like a good chef needs the right utensils, you’ll need the right tools to safely and effectively remove your tire from its rim. So, let’s dive right into it!
Manual Tire Changing Machine
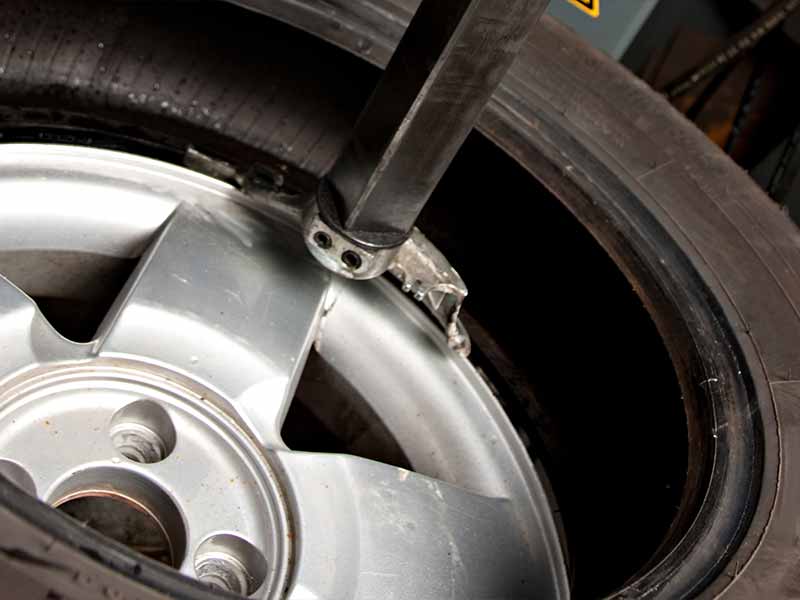
This is your best friend when it comes to manually removing a tire. This bad boy can handle most passenger car and light truck tires with ease. It’s a solid piece of equipment, designed with a long, handle-like arm called the tire changer arm. This tool helps you exert the force needed to pry the tire off the rim. It’s like your superhero sidekick for this operation.
Tire Bead Breaker
This tool is like a wrecking ball for the tire’s bead. The tire bead is the tough rubber that grips the rim of the wheel. You need to “break” it – don’t worry, it’s not as dramatic as it sounds – to loosen the tire from the rim. Our buddy, the tire bead breaker, makes this job a piece of cake. It applies a lot of force in a controlled way to safely separate the tire bead from the rim.
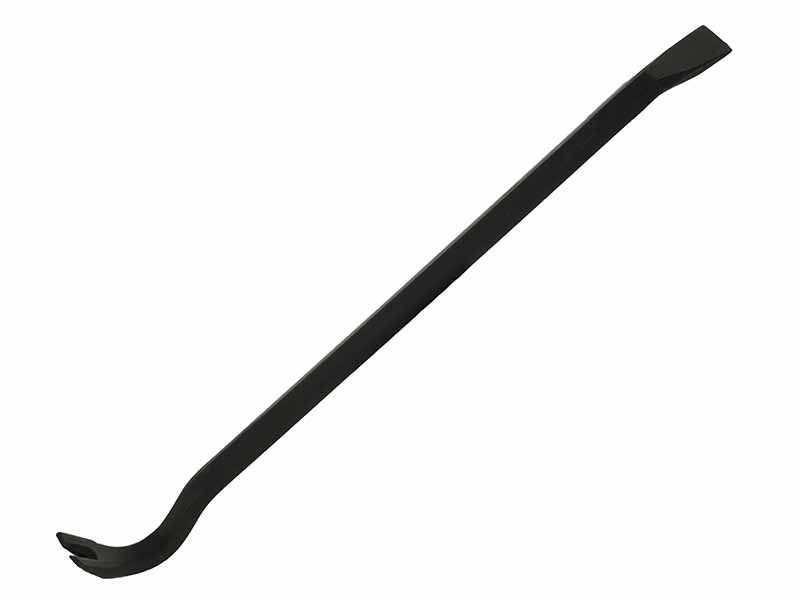
Pry Bar or Tire Iron
While the tire changing machine is your sidekick, the pry bar or tire iron is your superhero tool. These long, sturdy pieces of metal are like big levers that help you pull the tire away from the rim. They’re perfect for getting into those tight spots and giving you the leverage you need to free your tire.
Valve Core Removal Tool
This handy tool may not look like much, but it’s vital for the operation. The valve core is like the gatekeeper to your tire’s air supply. By removing the valve core with this tool, you can let all the air out of the tire. This makes the tire soft and flexible, so it’s easier to work with. Plus, deflating the tire helps keep everything safe – nobody wants a tire explosion in their garage
No products found.4-Way Valve Core Removal Tool
Understanding Tire Components
Before we dive into the nitty-gritty of removing a tire from a rim, we need to understand the components that we’ll be dealing with. A tire isn’t just a big round piece of rubber – it’s made up of several parts, each with a specific job. Let’s break it down.
Tire Bead
First up is the tire bead. Imagine the tire bead as the “glue” that keeps your tire attached to the rim. It’s a tough, sturdy band of rubber that sits on the inside edge of the tire, gripping onto the rim. When we talk about “breaking the bead,” we mean loosening this grip so the tire can be removed. Don’t worry though, we’re not breaking anything permanently. The bead will be just fine and can do its job again once the tire is put back on the rim.
Valve Core
Next, we have the valve core. Think of the valve core as the gatekeeper to your tire’s air. It’s located in the valve stem, which sticks out from the rim of your wheel. When the valve core is unscrewed, the air in your tire can escape. This deflates the tire, making it more flexible and easier to remove from the rim. And no worries, once we’re done, the valve core can be screwed back in and the tire can be inflated again.
Valve Stem
Lastly, there’s the valve stem. This little guy is like the doorway for air to enter or leave your tire. The valve core resides within the stem. It’s crucial to take good care of the valve stem when we’re removing and replacing tires because a damaged stem can lead to air leaks.
How To Remove A Tire From The Rim At Home
Ready to dive into the heart of the action, tire commander? Strap in because it’s time to get those hands dirty. Here’s a step-by-step guide on how to remove your tire from its rim at home, using all those tools and knowledge we’ve gathered so far. Remember, slow and steady wins the race, so no need to rush – let’s do this right.
Step 1: Preparation
First things first, make sure your wheel is flat on the ground and secure – we don’t want it rolling away mid-process. It might be helpful to put something heavy, like a brick or piece of wood, on either side of the wheel to keep it steady. And don’t forget to put on some good quality gloves to protect your hands.
Step 2: Remove The Valve Core
Next up, it’s time to let the air out of your tire. Using your valve core removal tool, carefully unscrew and remove the valve core from the valve stem. You’ll hear the air rushing out. Let the tire deflate completely – a softer, deflated tire will be much easier (and safer!) to work with.
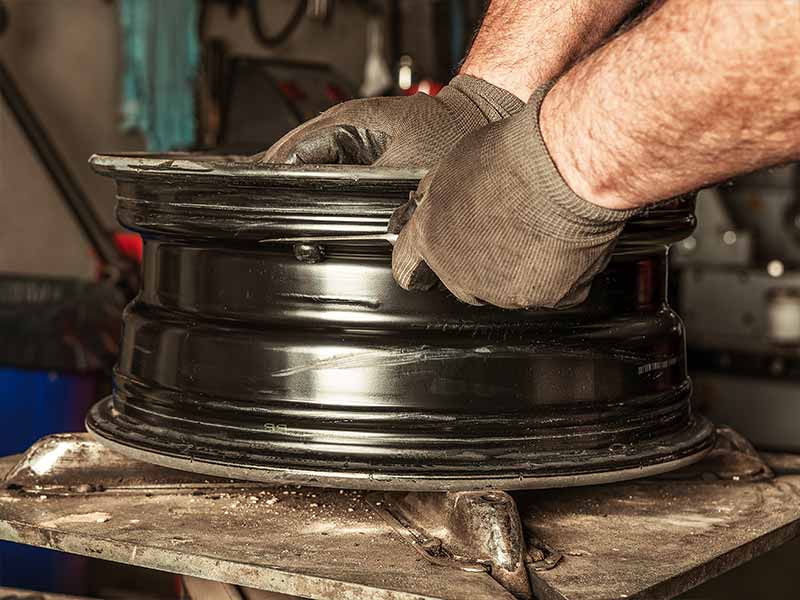
Step 3: Break The Tire Bead
Now that your tire is all deflated, it’s time to use your tire bead breaker. Position it against the tire bead and apply pressure until the bead breaks away from the rim. You might need to work your way around the tire, repeating the process a few times, until the bead is completely loosened.
Step 4: Lever The Tire Off
Finally, with the tire bead broken, it’s time to bring out your pry bar or tire iron. Insert it between the tire and the rim, and use it as a lever to pry the tire up and off the rim. Work your way around the tire, little by little, until one side of the tire is completely off the rim. Then flip the tire and repeat the process to remove the other side.
No products found.Bead Breaker
Fastest Way To Remove A Tire From The Rim
So, you’ve conquered tire removal, and now you’re thinking, “Can I do it faster?” We’re about to explore some tips and tricks to speed up your tire removal process. Remember, though, while speed is cool, safety is cooler. Let’s keep things safe and sound while we amp up the speed!
Preparation Is Key
Believe it or not, much of your speed will come from how well you prepare. Having your tools ready, your workspace clean and safe, and your wheel properly secured can save a lot of time. This way, you won’t have to stop and look for a tool or deal with a rolling wheel in the middle of the process.
Master The Bead Breaker
Your bead breaker can make or break (pun intended) your speed. If you can position it right on the first try, you’ll break the bead faster. Practice using your bead breaker to get a feel for its best position and angle. Remember, though, don’t use excessive force – we’re not trying to damage the bead, just loosen it.
Leverage Is Your Friend
When it comes to levering the tire off, the more leverage you have, the easier (and faster) it’ll be. Using a long pry bar or tire iron can give you more leverage, making it easier to pry the tire off. Just be careful not to damage the rim or tire with too much force.
Practice, Practice, Practice
Finally, remember the golden rule: practice makes perfect. The more you do it, the better you’ll get, and the faster you’ll be. Each time you remove a tire, you’ll learn something new, and you’ll get a bit quicker.
Cutting A Tire Off The Rim: Pros And Cons
Ah, the moment of curiosity has arrived! We’re about to delve into a bit of a controversial topic: cutting a tire off the rim. Yep, you read it right. Some folks believe in using a saw (like a sawzall) to cut right through the tire bead. Before you go grabbing your toolkit and running off to the garage, let’s discuss the pros and cons of this method. Buckle up, tire slayer, things are about to get interesting!
Pros Of Cutting A Tire Off
- Speed: No beating around the bush here, cutting a tire off can be fast. When done correctly, a saw can slice through the rubber and steel cords of the tire bead in no time. So, if speed is your game, this method might appeal to you.
- Convenience: If you’ve got a tire that’s stubbornly refusing to come off the rim, sometimes cutting can seem like the easiest way out. It can be a convenient method to deal with especially tough cases.
Cons Of Cutting A Tire Off
- Risk of Damage: This method isn’t for the faint-hearted. If not done carefully, you could end up damaging the metal rim or even your saw blade. Remember, a sawzall is designed to cut through wood or metal, not necessarily the composite materials of a tire.
- Waste: Let’s not forget, once you cut a tire off the rim, there’s no going back. This method can waste a perfectly good tire that might have otherwise been saved.
- Safety: Cutting through a tire comes with its own set of safety risks. The process can produce a lot of heat, potentially causing the tire to ignite. Not to mention the risk of injury from using a power tool like a saw.
Manual Tire Changer
Using A Manual Tire Changer: Steps and Tips
Are you ready for another exciting chapter in your tire-removal journey, wheel wizard? Now, we’re going to discuss the use of a manual tire changer. This nifty tool can make the tire removal process more manageable and a little more “mechanized” than the purely manual methods we’ve discussed so far. So, let’s dive in and see how we can use this contraption!
Step 1: Set Up The Tire Changer
Start by securely mounting your manual tire changer on a flat, solid surface. This could be your garage floor or even a large piece of plywood. Just make sure it’s somewhere you have enough space to move around freely.
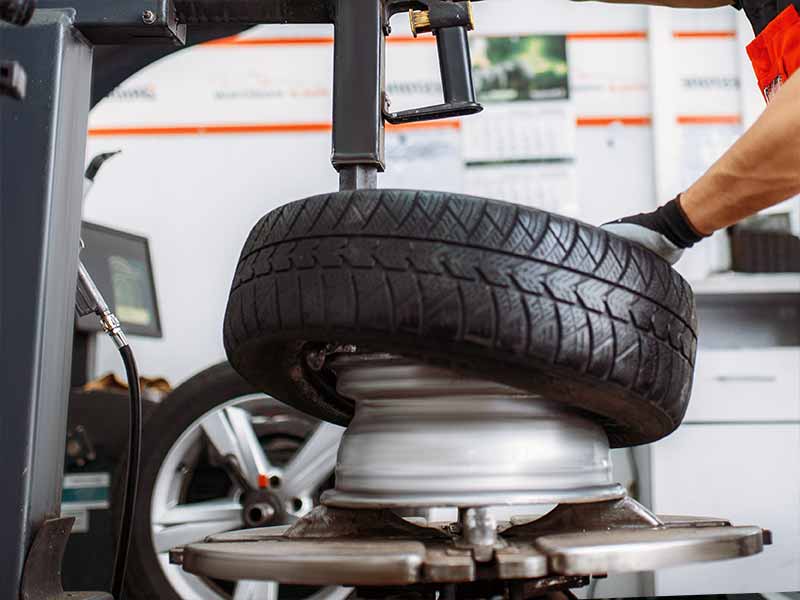
Step 2: Position The Tire
With your tire changer ready to go, position your tire onto the changer. The machine should have a dedicated spot for this, which will allow you to secure the rim for the next steps. Ensure the tire is stable and won’t move around while you’re working.
Step 3: Break The Bead
The manual tire changer should have a bead-breaking component. Use this to apply pressure to the tire bead until it pops free from the rim. Rotate the tire and repeat the process to ensure the bead is broken all around.
Step 4: Lever The Tire Off
Now that the bead is broken, it’s time to use the long, handle-like arm of the tire changer – the tire changer arm. This acts as a lever, helping you pry the tire off the rim. Remember to work your way around the tire, not trying to remove it all at once.
Tips For Using A Manual Tire Changer
- Don’t Rush: Even though you’re using a machine, this is still a manual process. Take your time, apply steady pressure, and don’t rush.
- Keep It Safe: Always use safety gear, including gloves and eye protection, when using a tire changer.
- Regular Maintenance: Like any machine, your manual tire changer will work better and last longer if it’s well-maintained. Clean it regularly and keep all moving parts well-lubricated.

Does Removing A Tire From The Rim Damage It?
Hey there, wheel warrior! As we’ve been journeying through the world of tire removal, a question might have popped up in your mind: “Does all this prying and levering damage my tire or rim?” That’s a great question, and it’s time we addressed it. Let’s delve into the potential risks and how to avoid them.
The Tire Bead
One of the main concerns during tire removal is the tire bead. Remember, this is the sturdy band of rubber that holds your tire onto the rim. If this is damaged, it can lead to a poor seal when the tire is reinstalled, causing air leaks. But don’t worry! If you’re careful and use the right tools, you can avoid damaging the bead. Remember to apply steady, even pressure when breaking the bead, and never use sharp tools that could cut or puncture the bead.
The Rim
Your rim is another potential point of concern. This is the metal part of your wheel, and it can be scratched or dented if not handled correctly. Always use tools with smooth, rounded edges to prevent scratching. And if you’re using a pry bar or tire iron, make sure you’re levering against the tire, not the rim.
The Valve Stem
Finally, we have the valve stem. This little component is crucial for keeping your tire inflated, and it can be damaged if not treated with care. Always remove the valve core gently, and make sure not to knock or bash the valve stem during the tire removal process.
Resources
Below are some links you may find helpful when learning about tires
- How to remove a tire from a rim – Get Jerry
- How to remove a tire from the rim with hand tools – It Still Runs
Final Thoughts
In this do-it-yourself guide, we’ve discovered that removing a tire from a rim without a machine is indeed possible and can even be done with tools you may have lying around in your garage. The most critical elements to a successful tire removal process are patience, the right techniques, and some essential tools including a bead breaker or pry bar, a manual tire changing machine, and a valve core removal tool.
We’ve learned how to safely break a tire bead by hand, the importance of avoiding damage to the tire and rim, and the value of maintaining the integrity of the tire bead, rim, and valve stem. Remember, when in doubt or faced with a particularly stubborn tire, it’s always best to ask a professional for help. With the right knowledge and a bit of muscle, you’re now equipped to take on the challenge of tire removal.
Good luck and happy motoring.